> For the complete documentation index, see [llms.txt](https://docs.avonnicomponents.com/llms.txt). Markdown versions of documentation pages are available by appending `.md` to page URLs; this page is available as [Markdown](https://docs.avonnicomponents.com/flow/flow-components/avatar.md).
# Avatar
The Avonni Avatar component allows your users to express themselves visually by choosing an image or icon that represents them within your application.
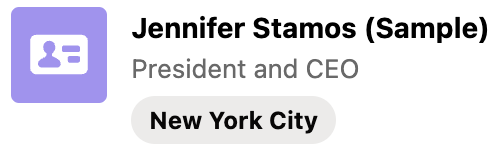
The Avonni Avatar displays a single person or entity using an image, initials, or an icon fallback. Use it to visually identify a user or record on a Flow screen — optionally with text details, status indicators, and action buttons.
***
## Overview
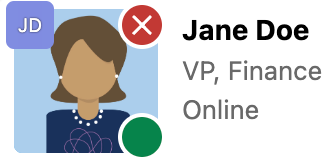
The Avatar supports rich layering: a shape and size for the main image area, optional overlay indicators for status and presence, an entity badge, detail text lines beside it, and tags. Actions open a button-menu dropdown for quick tasks.
***
## Tutorials
The following examples demonstrate some of the available functionality for the Avatar component.
***
## Configuration
To configure it, click the component on the Flow screen. The Edit Avatar Component panel opens on the right with three tabs: Properties, Interactions, and Style. The sections below mirror the Properties tab.
### Properties
**Icon Name** sets the Lightning Design System icon displayed when no image is available and influences the background color when using initials. Specify in the format `standard:contact`.
**Initials** shows letter-based initials when no image is loaded. For two-word names use the first letter of each word (e.g., "JD" for John Doe); for single-word names use the first two letters. Leave blank if the avatar always has an image.
**Initials Auto Formatted** — when enabled, initials are generated automatically from the name: the first letter of each word for multi-word names, or the first two letters for a single word.
**Image Source** is the URL or Salesforce ContentDocumentId of the avatar photo. Leave blank if using initials or a fallback icon.
**URL** makes the entire avatar a clickable link. Enter a web address to navigate the user when they click the avatar.
**Variant** sets the shape: Circle or Square.
**Size** controls how large the avatar appears: X-Small, Small, Medium, Large, X-Large, XX-Large, or XXX-Large.
**Icon Position** aligns icon-type avatars within their container: Start, Center, or End.
**Alternative Text** provides an accessible text description of the avatar for screen readers.
### Details
**Hide Details** — when enabled, the primary, secondary, and tertiary text lines are hidden.
**Primary Text** is the main label displayed alongside the avatar, typically a person's name.
**Primary Text Page Reference** — configure a navigation interaction triggered when the user clicks the primary text. Use this to link to a record page or external URL directly from the text.
**Secondary Text** is the secondary label, typically a role or title.
**Tertiary Text** is an additional detail line, typically a status message. Only visible when Size is X-Large or XX-Large.
**Text Position** controls where the text appears relative to the avatar: Right (default), Left, or Center.
**Tags** adds badge chips below the detail text. Configure a label and variant (Default, Inverse, etc.) for each tag.
Text displayed next to the avatar icon.
### Status
Overlays a status icon on the avatar corner to indicate a record state.
**Type** sets the status type: Approved, Locked, Declined, or Unknown.
**Position** controls which corner the status icon appears in: Top-Left, Top-Right, Bottom-Left, or Bottom-Right. Default: Top-Right.
### Presence
Overlays a presence indicator showing a user's availability.
**Type** sets the presence state: Online, Busy, Focus, Offline, Blocked, or Away.
**Position** controls which corner the indicator appears in: Top-Left, Top-Right, Bottom-Left, or Bottom-Right. Default: Bottom-Right.
### Entity
Overlays a smaller secondary avatar (the "entity") representing a related object — for example, showing the Account icon alongside a Contact avatar.
Configure **Icon Name**, **Initials**, **Image Source**, **Variant** (Circle or Square), and **Position** (Top-Left, Top-Right, Bottom-Left, Bottom-Right) for the entity badge.
### Actions
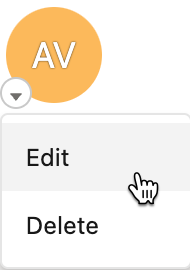
Actions add a dropdown button-menu to the avatar for quick tasks.
{% hint style="info" %}
Adding actions is required to create interactions with the avatar. Actions are only displayed with the avatar size set to small or above.
{% endhint %}
Actions on an avatar
Define one or more actions. With a single action, a direct icon button appears; with multiple actions, they collapse into a button menu. Wire the **On Action Click** interaction to respond to each action.
**Position** sets where the action button or menu appears relative to the avatar: Top Left, Top Right, Bottom Left, or Bottom Right. Default: Bottom Left.
**Icon Name** sets an optional custom icon to replace the default button-menu down-arrow icon.
### Advanced Options
These tooltip fields appear when you turn on **Advanced** in the panel. Each sets the text shown on hover over its indicator.
**Title (Status)** — tooltip shown when hovering over the status icon. Requires a **Status Type** to be set.
**Title (Presence)** — tooltip shown when hovering over the presence icon. Requires a **Presence Type** to be set.
**Title (Entity)** — tooltip shown when hovering over the entity icon. Requires an entity to be configured.
***
## Interactions
[Interactions](/flow/component-builder/interactions-panel.md) define what happens when users interact with the Avatar. Configure them from the **Interactions** tab of the Edit Avatar panel.
### Action Click
Fires when a user clicks an action button on the avatar. The name of the clicked action is available as the `targetName` output variable, so you can branch logic or trigger different actions based on which action was selected.
### Click
Fires when a user clicks the avatar. Use this to navigate to a record page, open a modal, or trigger any downstream logic when the avatar is clicked.
***
## Styling
The **Style** tab gives you fine-grained control over the Avatar's appearance, overriding the default styles. Configure it from the **Style** tab of the Edit Avatar panel.
{% tabs %}
{% tab title="Margin" %}
Controls the *outer* spacing around the avatar, creating space between it and other elements on the screen.
* **Top / Right / Bottom / Left:** Adjust the space on each side of the avatar.
{% endtab %}
{% tab title="Padding" %}
Controls the *inner* spacing between the avatar's content and its border.
* **Top / Right / Bottom / Left:** Adjust the inner spacing on each side.
{% endtab %}
{% tab title="Size" %}
Controls the avatar container's dimensions.
* **Width / Height:** Set fixed dimensions for the avatar.
* **Min Width / Max Width / Min Height / Max Height:** Constrain the size within bounds.
* **Overflow:** Control how content that exceeds the bounds is handled.
{% endtab %}
{% tab title="Border" %}
Customizes the border surrounding the avatar container.
* **Color:** Set the border color.
* **Size:** Adjust the border thickness.
* **Style:** Choose a border style (e.g. solid, dashed, dotted).
* **Radius:** Control the roundness of the corners.
{% endtab %}
{% tab title="Background" %}
Sets the avatar container's background.
* **Color:** Set the background color.
{% endtab %}
{% tab title="Flow Dialog" %}
Adjusts the avatar's display when it is opened as a modal dialog inside a Flow screen.
* **Width:** Dialog width.
* **Height:** Dialog height.
* **Background Color:** Dialog background color.
{% endtab %}
{% tab title="Avatar Border" %}
Customizes the border drawn around the avatar image itself.
* **Color:** Set the border color.
* **Size:** Adjust the border thickness.
* **Style:** Choose a border style (e.g. solid, dashed, dotted).
* **Radius:** Control the roundness of the corners.
{% endtab %}
{% tab title="Avatar" %}
Styles the avatar's image and fallback-icon area.
* **Background Color:** Set the fallback icon's background color.
* **Foreground Color:** Set the fallback icon's color.
* **Image Object Fit:** Control how the image fills its area (e.g. cover, contain).
{% endtab %}
{% tab title="Primary Text" %}
Styles the primary detail line beside the avatar.
* **Color:** Set the text color.
* **Font Size / Font Style / Font Weight:** Control the primary text typography.
{% endtab %}
{% tab title="Secondary Text" %}
Styles the secondary detail line beside the avatar.
* **Color:** Set the text color.
* **Font Size / Font Style / Font Weight:** Control the secondary text typography.
{% endtab %}
{% tab title="Tertiary Text" %}
Styles the tertiary detail line beside the avatar.
* **Color:** Set the text color.
* **Font Size / Font Style / Font Weight:** Control the tertiary text typography.
{% endtab %}
{% tab title="Action" %}
Styles the action button-menu attached to the avatar.
* **Background Color:** Set the action button's background color.
* **Foreground Color:** Set the action button's icon color.
* **Border Color:** Set the action button's border color.
* **Border Radius:** Control the roundness of the action button's corners.
{% endtab %}
{% tab title="Initials" %}
Styles the letter-based initials shown when no image is loaded.
* **Color / Color Hover:** Set the initials color in its default and hover states.
* **Font Style / Font Weight:** Control the initials typography.
{% endtab %}
{% tab title="Entity" %}
Styles the smaller secondary avatar (the "entity") overlaid on the main avatar.
* **Border Radius / Border Color / Border Style / Border Size:** Customize the entity border.
* **Background Color:** Set the entity fallback icon's background color.
* **Foreground Color:** Set the entity fallback icon's color.
* **Image Object Fit:** Control how the entity image fills its area.
* **Initials Color / Initials Font Style / Initials Font Weight:** Style the entity initials.
{% endtab %}
{% tab title="Presence" %}
Styles the presence indicator overlaid on the avatar.
* **Border Color / Border Radius:** Customize the indicator's border.
* **Away / Blocked / Busy / Focus / Offline / Online Background:** Set the background color for each presence state.
{% endtab %}
{% tab title="Status" %}
Styles the status icon overlaid on the avatar.
* **Border Color / Border Radius:** Customize the status icon's border.
* **Approved / Declined / Locked / Unknown Background:** Set the background color for each status state.
{% endtab %}
{% endtabs %}
***
## Output Variables
The Avatar exposes these output variables you can reference in your flow after the screen. To use them, select the screen element in Flow Builder, then the Avatar component, and pick the output variable you need.
### Action Click
When a user clicks an action button on the avatar.
| Output variable | Type | What it returns |
| ----------------------- | ------------- | ---------------------------------------- |
| **Clicked Action Name** | Text (String) | The name of the action the user clicked. |
> **Example:** Configure two actions — "Edit" and "Delete" — then branch your flow on **Clicked Action Name** to handle each case differently.
### Flow Interaction Output Variables
Like all interactive Flow components, the Avatar exposes generic output slots (Variable 1–10) that an [Open Flow Dialog](/flow/component-builder/interactions-panel/open-flow-dialog.md) or [Open Flow Panel](/flow/component-builder/interactions-panel/open-flow-panel.md) interaction can fill with values from a launched flow. See [Flow Interaction Output Variables](/flow/component-builder/interactions-panel/flow-interaction-output-variables.md).
---
# Agent Instructions
This documentation is published with GitBook. GitBook is the documentation platform designed so that both humans and AI agents can read, navigate, and reason over technical content effectively. Learn more at gitbook.com.
## Querying This Documentation
If you need additional information that is not directly available in this page, you can query the documentation dynamically by asking a question.
Perform an HTTP GET request on the current page URL with the `ask` query parameter, and the optional `goal` query parameter:
```
GET https://docs.avonnicomponents.com/flow/flow-components/avatar.md?ask=&goal=
```
`ask` is the immediate question: it should be specific, self-contained, and written in natural language.
`goal` is optional and describes the broader end goal you are ultimately trying to accomplish on behalf of the user. GitBook uses it to tailor the answer towards what is most useful for that goal.
The response will contain a direct answer to the question and relevant excerpts and sources from the documentation.
Use this mechanism when the answer is not explicitly present in the current page, you need clarification or additional context, or you want to retrieve related documentation sections.
.avif?alt=media)