> For the complete documentation index, see [llms.txt](https://docs.avonnicomponents.com/llms.txt). Markdown versions of documentation pages are available by appending `.md` to page URLs; this page is available as [Markdown](https://docs.avonnicomponents.com/flow/flow-components/visual-picker-link.md).

# Visual Picker Link

## Overview

<figure><img src="/files/Q9Ivl77pv6h72P9E2uIM" alt="" width="375"><figcaption></figcaption></figure>

The Visual Picker Link displays a selectable card containing a title, rich content, and an optional icon. Use it to create clickable information tiles — for example, links to Salesforce pages, onboarding steps with completion tracking, or navigation choices in a welcome mat-style layout.

***

## Configuration

To configure it, click the component on the Flow screen. The **Edit Visual Picker Link Component** panel opens on the right with three tabs: Properties, Interactions, and Style. The sections below mirror the Properties tab.

### Properties

**Title** sets the main heading of the picker card.

**Content** sets the body text or rich content displayed below the title.

**Icon Name** adds a Lightning Design System icon to the card. Specify the name in the format `utility:knowledge_base`.

**Icon Position** sets where the icon appears relative to the content. Options: Left, Right.

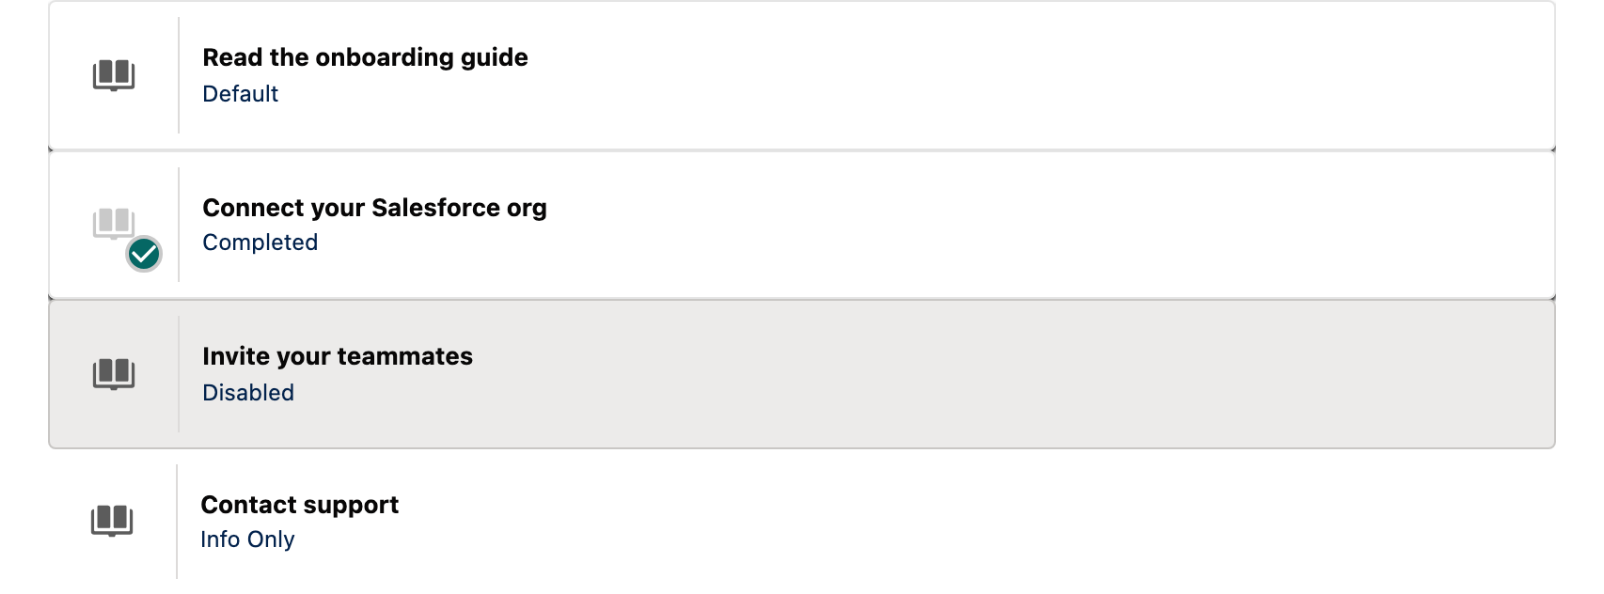
**Completed** displays the picker card in a "completed" visual state — useful for tracking which steps a user has finished.

**Disabled** grays out the card and prevents interaction.

**Info Only** displays the card as purely informational, with no selection behavior.

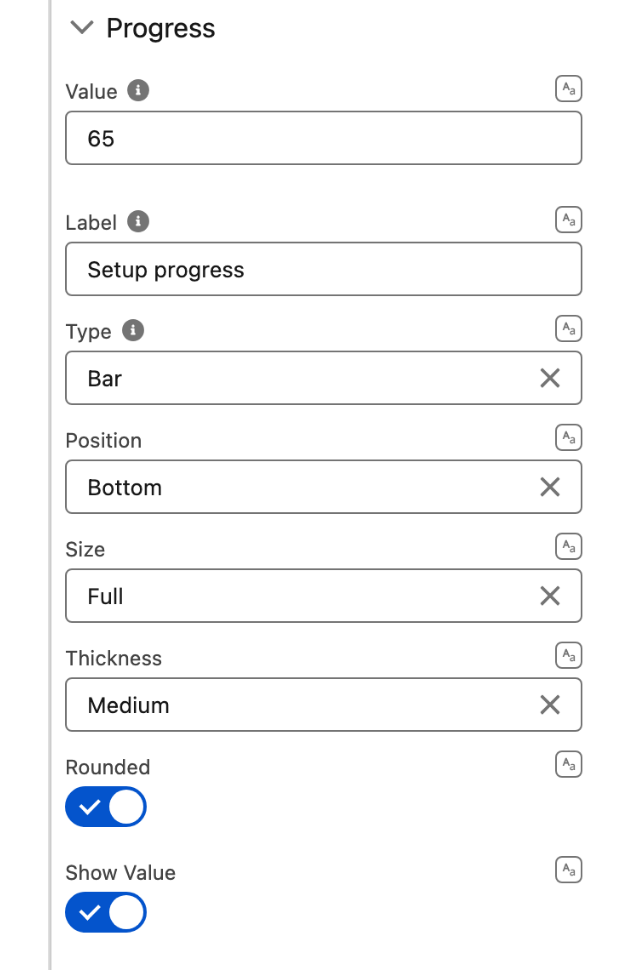
### Progress

Use the **Progress** section to embed a progress indicator inside the picker card.

**Value** sets the current progress as a percentage (0–100).

Additional progress attributes let you configure the indicator type (Bar or Circle), label, whether to show the numeric value, and accessibility text.

***

## Interactions

[Interactions](/flow/component-builder/interactions-panel.md) define what happens when users interact with the Visual Picker Link. Configure them from the **Interactions** tab of the Edit Visual Picker Link panel.

### Click

Fires when the user clicks the picker card. The `isClicked` output variable is set to `true`, which you can use to drive conditional logic or record the selection downstream.

***

## Styling

The **Style** tab lets you customize the appearance of the Visual Picker Link. Configure it from the **Style** tab of the Edit panel. Available sections vary slightly with the **Info Only** setting.

{% tabs %}
{% tab title="Margin" %}
Controls the *outer* spacing around the component.

* **Top / Right / Bottom / Left:** Adjust the space on each side.
  {% endtab %}

{% tab title="Padding" %}
Controls the *inner* spacing between content and the border.

* **Top / Right / Bottom / Left:** Adjust the inner spacing on each side.
  {% endtab %}

{% tab title="Border" %}
Customizes the component and tile borders.

* **Color / Size / Style / Radius:** Control the component border color, thickness, line style, and corner roundness.
* **Color Hover / Color Disabled / Size Hover / Style Hover:** Set tile border styling for the hover and disabled states (interactive variant only).
  {% endtab %}

{% tab title="Tile" %}
Sets the tile background.

* **Background Color:** Set the tile background color.
* **Background Color Disabled:** Set the tile background for the disabled state (interactive variant only).
  {% endtab %}

{% tab title="Title" %}
Styles the tile title text.

* **Color:** Set the title text color.
* **Font Size / Font Style / Font Weight:** Control the title typography.
* **Line Clamp:** Limit the title to a maximum number of lines.
  {% endtab %}

{% tab title="Description" %}
Styles the tile description text.

* **Line Clamp:** Limit the description to a maximum number of lines.
  {% endtab %}

{% tab title="Icon" %}
Styles the icon within the tile.

* **Background / Background Completed:** Set the icon background for the default and completed states.
* **Foreground:** Set the icon color.
* **Border Radius:** Control the roundness of the icon corners.
  {% endtab %}

{% tab title="Progress Bar" %}
Styles the optional progress bar.

* **Color / Completed Color:** Set the bar background and the completed-portion color.
* **Label Font Color / Label Font Size / Label Font Style / Label Font Weight:** Control the label typography.
* **Value Color / Value Font Size / Value Font Style / Value Font Weight:** Control the value typography.
  {% endtab %}

{% tab title="Progress Circle" %}
Styles the optional progress circle.

* **Background Color / Bar Color / Completed Bar Color:** Set the circle background, bar, and completed-bar colors.
* **Value Color / Value Font Style / Value Font Weight:** Control the value typography.
* **Label Font Color / Label Font Style / Label Font Weight:** Control the label typography.
  {% endtab %}

{% tab title="Separator" %}
Styles the separator between items.

* **Color:** Set the separator color.
* **Size / Style:** Control the separator thickness and line style.
  {% endtab %}
  {% endtabs %}

***

## Examples

<figure><img src="/files/CJDIFmWvE6b9m8JoMUs4" alt=""><figcaption></figcaption></figure>

<table><thead><tr><th width="214">Property</th><th>Value</th></tr></thead><tbody><tr><td>Title</td><td>Avonni Component Builder Documentation Website</td></tr><tr><td>Content</td><td>This documentation explains.....</td></tr><tr><td>Icon Name</td><td>utility:knowledge_base</td></tr><tr><td>Icon Position</td><td>Left</td></tr></tbody></table>

***

## Output Variables

The Visual Picker Link exposes these output variables you can reference in your flow after the screen. To use them, select the screen element in Flow Builder, then the Visual Picker Link component, and pick the output variable you need.

### Click

| Output variable | Type    | What it returns                                                                                                                                                  |
| --------------- | ------- | ---------------------------------------------------------------------------------------------------------------------------------------------------------------- |
| **Is Clicked**  | Boolean | `true` when the user has clicked the picker card during the current screen visit. Use this to drive conditional navigation or record the interaction downstream. |

> **Example:** Branch a decision element on **Is Clicked** to navigate the user to a record page only when they clicked a specific Visual Picker Link card.

### Flow Interaction Output Variables

Like all interactive Flow components, the Visual Picker Link exposes generic output slots (Variable 1–10) that an [Open Flow Dialog](/flow/component-builder/interactions-panel/open-flow-dialog.md) or [Open Flow Panel](/flow/component-builder/interactions-panel/open-flow-panel.md) interaction can fill with values from a launched flow. See [Flow Interaction Output Variables](/flow/component-builder/interactions-panel/flow-interaction-output-variables.md).


---

# Agent Instructions
This documentation is published with GitBook. GitBook is the documentation platform designed so that both humans and AI agents can read, navigate, and reason over technical content effectively. Learn more at gitbook.com.

## Querying This Documentation
If you need additional information that is not directly available in this page, you can query the documentation dynamically by asking a question.

Perform an HTTP GET request on the current page URL with the `ask` query parameter, and the optional `goal` query parameter:

```
GET https://docs.avonnicomponents.com/flow/flow-components/visual-picker-link.md?ask=<question>&goal=<endgoal>
```

`ask` is the immediate question: it should be specific, self-contained, and written in natural language.
`goal` is optional and describes the broader end goal you are ultimately trying to accomplish on behalf of the user. GitBook uses it to tailor the answer towards what is most useful for that goal.

The response will contain a direct answer to the question and relevant excerpts and sources from the documentation.

Use this mechanism when the answer is not explicitly present in the current page, you need clarification or additional context, or you want to retrieve related documentation sections.