> For the complete documentation index, see [llms.txt](https://docs.avonnicomponents.com/llms.txt). Markdown versions of documentation pages are available by appending `.md` to page URLs; this page is available as [Markdown](https://docs.avonnicomponents.com/flow/flow-components/button-group.md).
# Button Group
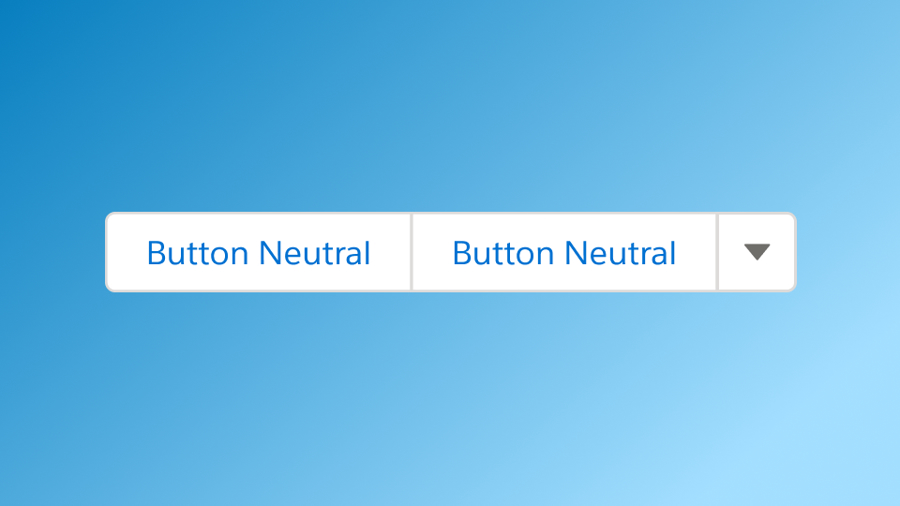
The Avonni Button Group component provides a cohesive way to group buttons in Salesforce Flow screens, improving usability and visual clarity.
The Avonni Button Group displays a set of buttons together on a Flow screen. Use it to offer users multiple related actions — navigation choices, triage decisions, or workflow branches — in a compact, organized layout.
***
## Overview
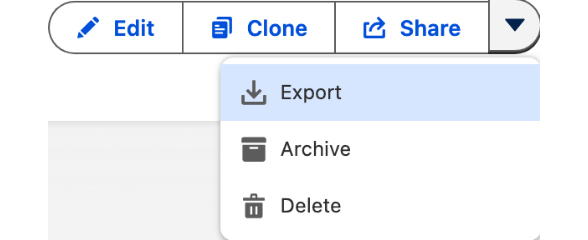
Each button in the group can have its own label, icon, variant, and name. When more buttons exist than the **Visible Buttons** limit allows, the overflow automatically moves into a dropdown button menu. Templates are available for common use cases.
### Use Cases
| Use Case | Description | Illustration |
| --------------------------- | ------------------------------------------------------------------------------------ | ---------------------------------------------------------------------------------------------------------------------------------------------------------------------------------------------------------------- |
| **Brand Overflow Menu** | Dropdown menu with brand-specific actions, consolidating tasks in one place. |  |
| **Button Group Icon** | Group icons representing common tasks for aesthetic and functional enhancement. |  |
| **Modal Footer (Center)** | Center-aligned buttons in modal dialogs for primary actions. |  |
| **Modal Footer (Left)** | Left-aligned buttons in modal footers for secondary or navigational actions. |  |
| **Modal Footer (Right)** | Right-aligned buttons in modal footers, typically used for closing or final actions. |  |
| **Overflow Menu** | A menu for additional options, especially useful in limited space. |  |
| **Toolbar** | Toolbar with grouped buttons for quick access to frequently used functions. |  |
| **Topbar with Back Button** | Top navigation bar in a flow, featuring a back button for easy step navigation. |  |
{% hint style="info" %}
You can find these examples in the '[Templates](/flow/component-builder/component-templates.md)' section of the Avonni Button Group Component.
{% endhint %}
***
## Configuration
To configure it, click the component on the Flow screen. The Edit Button Group Component panel opens on the right with three tabs: Properties, Interactions, and Style. The sections below mirror the Properties tab.
### Properties
**Display as Row** — when enabled, buttons are separated with spacing between them instead of being joined into a compact group.
**Visible Buttons** — limits how many buttons are shown directly. If not set, all buttons are shown. Buttons beyond the limit move into the overflow button menu.
**Buttons** — define each button in the group. For each button, configure:
* **Label** — the text shown on the button.
* **Icon Name** — an optional Lightning Design System icon.
* **Icon Position** — place the icon to the left or right of the label. Requires an **Icon Name**.
* **Icon Source** — a custom image URL or uploaded file to use as the button icon instead of a Lightning Design System icon. Takes priority over Icon Name.
* **Variant** — the button's visual style: Base, Bare, Bare Inverse, Border, Border Filled, Border Inverse, Brand, Brand Outline, Container, Destructive, Destructive Text, Inverse, Neutral, or Success.
* **Disabled** — when enabled, users cannot click this button.
* **Hidden** — when enabled, this button is not shown.
* **Tooltip** — a short description shown when hovering over the button.
* **Title** — text displayed when hovering over the button.
* **Name** — a unique identifier for the button, used to detect which button was clicked in the **Click** interaction.
* **Alternative Text** — assistive text describing the button for accessibility.
### Button Menu
Configure the overflow button menu that appears when **Visible Buttons** is set:
* **Label** — text shown on the overflow button.
* **Icon Name** — icon for the overflow button trigger.
* **Variant** — visual style for the overflow button. Default: Border-Filled.
* **Menu Alignment** — position of the dropdown relative to the button: Left or Right. Default: Right.
***
## Interactions
[Interactions](/flow/component-builder/interactions-panel.md) define what happens when users interact with the Button Group. Configure them from the **Interactions** tab of the Edit Button Group panel.
### Click
Fires when a user clicks any button in the group. The name of the clicked button is available as `targetName` and is also stored in the **Clicked Button Name** output attribute, which you can use in downstream Decision elements to branch the flow.
***
## Styling
The **Style** tab gives you control over the button group's spacing, container, label typography, and per-variant button colors. Configure it from the **Style** tab of the button group's property editor.
{% tabs %}
{% tab title="Margin" %}
Controls the *outer* spacing around the button group, creating space between it and other elements on the screen.
* **Top / Right / Bottom / Left:** Adjust the space on each side of the button group.
{% endtab %}
{% tab title="Padding" %}
Controls the *inner* spacing between the button group and its border.
* **Top / Right / Bottom / Left:** Adjust the inner spacing on each side.
{% endtab %}
{% tab title="Border" %}
Customizes the border surrounding the button group.
* **Color:** Set the border color.
* **Size:** Adjust the border thickness.
* **Style:** Choose a border style (e.g. solid, dashed, dotted).
* **Radius:** Control the roundness of the corners.
{% endtab %}
{% tab title="Background" %}
Sets the button group's background.
* **Color:** Set the background color.
{% endtab %}
{% tab title="Flow Dialog" %}
Adjusts display when opened as a modal dialog inside a Flow screen.
* **Width:** Sets the dialog width.
* **Height:** Sets the dialog height.
* **Background Color:** Sets the dialog background color.
{% endtab %}
{% tab title="Label" %}
Styles the button label text.
* **Font Size / Font Style / Font Weight / Font Family:** Control the label typography.
{% endtab %}
{% tab title="Buttons Border" %}
Customizes the border between the grouped buttons.
* **Size:** Adjust the border thickness.
* **Style:** Choose a border style (e.g. solid, dashed, dotted).
{% endtab %}
{% tab title="Variant" %}
Sets the button colors (set per variant: Bare, Bare Inverse, Base, Border, Border Filled, Border Inverse, Brand, Brand Outline, Container, Destructive, Destructive Text, Inverse, Neutral, Success).
* **Background Color / Background Color Active / Background Color Hover:** Set the button background in each state.
* **Text Color / Text Color Active / Text Color Hover:** Set the label color in each state.
* **Border Color / Border Color Active / Border Color Hover:** Set the button border color in each state.
{% endtab %}
{% endtabs %}
***
## Output Variables
The Button Group exposes these output variables you can reference in your flow after the screen. To use them, select the screen element in Flow Builder, then the Button Group component, and pick the output variable you need.
### Button Click
| Output variable | Type | What it returns |
| ----------------------- | ------------- | ----------------------------------------------------------------------------------------------------------------------------------------- |
| **Clicked Button Name** | Text (String) | The name of the button the user clicked. Use this in a downstream Decision element to branch the flow based on which button was selected. |
> **Example:** A triage screen has three buttons — "Escalate", "Resolve", and "Defer". After the screen, a Decision element checks **Clicked Button Name** and routes the record to the appropriate next step.
### Flow Interaction Output Variables
Like all interactive Flow components, the Button Group exposes generic output slots (Variable 1–10) that an [Open Flow Dialog](/flow/component-builder/interactions-panel/open-flow-dialog.md) or [Open Flow Panel](/flow/component-builder/interactions-panel/open-flow-panel.md) interaction can fill with values from a launched flow. See [Flow Interaction Output Variables](/flow/component-builder/interactions-panel/flow-interaction-output-variables.md).
---
# Agent Instructions
This documentation is published with GitBook. GitBook is the documentation platform designed so that both humans and AI agents can read, navigate, and reason over technical content effectively. Learn more at gitbook.com.
## Querying This Documentation
If you need additional information that is not directly available in this page, you can query the documentation dynamically by asking a question.
Perform an HTTP GET request on the current page URL with the `ask` query parameter, and the optional `goal` query parameter:
```
GET https://docs.avonnicomponents.com/flow/flow-components/button-group.md?ask=&goal=
```
`ask` is the immediate question: it should be specific, self-contained, and written in natural language.
`goal` is optional and describes the broader end goal you are ultimately trying to accomplish on behalf of the user. GitBook uses it to tailor the answer towards what is most useful for that goal.
The response will contain a direct answer to the question and relevant excerpts and sources from the documentation.
Use this mechanism when the answer is not explicitly present in the current page, you need clarification or additional context, or you want to retrieve related documentation sections.