> For the complete documentation index, see [llms.txt](https://docs.avonnicomponents.com/llms.txt). Markdown versions of documentation pages are available by appending `.md` to page URLs; this page is available as [Markdown](https://docs.avonnicomponents.com/dynamic-components/components/card.md).
# Card
The Avonni Card component is a flexible container that organizes related information into a structured, visually distinct layout — with dedicated slots for a title, header actions, body content, media, and a footer. Use it to frame content as a cohesive unit without manually styling borders or padding.
## Overview
The Card acts as a fundamental container and structural frame for your content, providing a distinct visual boundary that organizes related information into a cohesive unit.
Unlike simple layout blocks, the Card comes pre-configured with dedicated slots for a title, actions, content, media, and footer, allowing you to rapidly build consistent interfaces. Its primary function is to serve as a parent container that holds other Avonni components.
| Use Case | Description | Example |
| ----------------- | ----------------------------------------------------------------- | -------------------------------------------------------------------------------------------------------- |
| Dashboard Widgets | Group metrics and charts into distinct, digestible blocks. | A card containing a "Quarterly Sales" chart with a "Refresh" button in the header action slot. |
| Record Profiles | Display summary information for a person or object. | A "User Profile" card featuring an avatar, contact details, and quick links in the footer. |
| Product Displays | Showcase items in a grid layout (Gallery view). | A card showing a product image, description, price, and an "Add to Cart" button. |
| Form Organization | Group related input fields logically to improve form readability. | A card titled "Shipping Address" containing specific address input fields, separate from "Billing Info". |
## Configuration
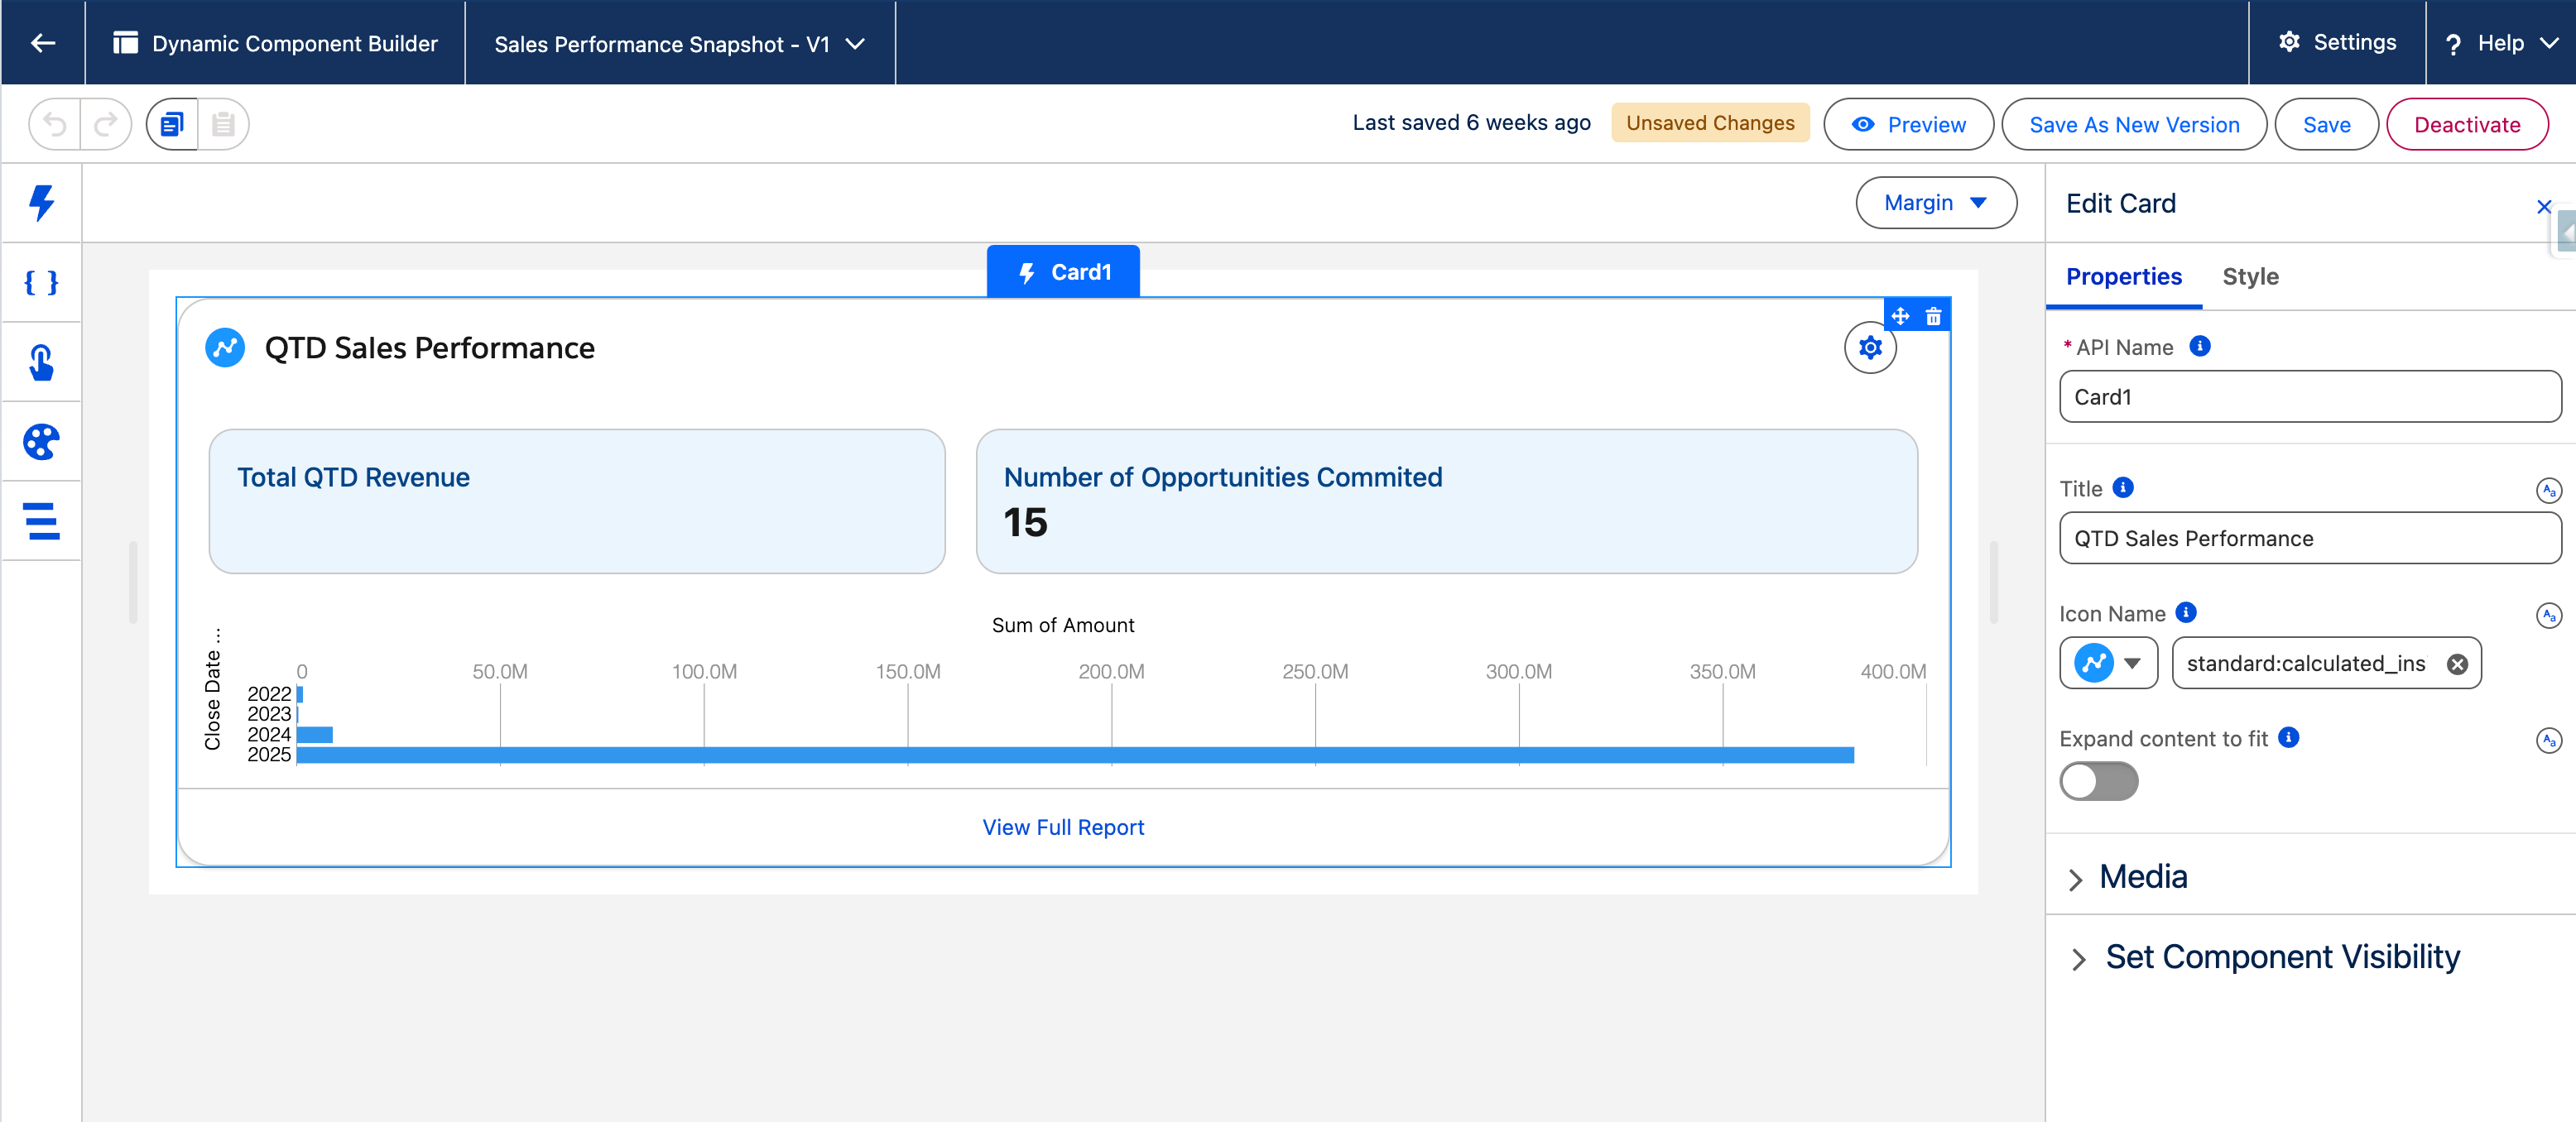
To configure the Card, select it on the canvas. The **Edit Card** panel opens on the right with two tabs: **Properties** and **Style**. The sections below mirror the Properties tab.
### Properties
The top of the Properties tab holds the card's header and behavior settings.
* **Title:** Enter a clear, concise title that appears prominently at the top of the Card. When a title is provided, the title slot is handled for you and will not appear separately in the canvas. Leave the title empty to reveal an open title slot for adding custom content.
* **Icon Name:** Add a Lightning Design System icon next to the title to enhance visual context (for example, `standard:account`).
* **Expand content to fit:** When enabled, the card's default padding is removed so its content can stretch edge-to-edge to fill the available space.
{% hint style="success" %}
**Pro Tip**
Removing the title text from the card component will reveal a slot for adding custom content.
{% endhint %}
### Media
Expand the **Media** section to make your Card more visually engaging with an image.
* **Source:** Provide the URL of the image to associate with the card. You can select from supported image formats including PNG, JPG, GIF, SVG, WebP, and AVIF.
* **Position:** Choose how the image is displayed relative to the card content:
* **Left**, **Top** (default), **Right**, **Bottom**: Places the image alongside the main content area.
* **Center**: Centers the image within the card.
* **Background**: Uses the image as a background for the entire card.
* **Overlay**: Overlays the image on top of the card's content.
### Slots (The Power of Slots)
What truly makes the Card powerful is its ability to contain other components. Beyond the title, the Card exposes several slots you fill by dragging components onto the canvas:
* **Actions Slot:** A dedicated `actions` slot in the header (usually top-right). Drag components such as Button or Button Menu here to provide users with actions related to the card's content.
* **Content Slot:** The main body of the Card is a flexible slot. You can drag **any** other Avonni component here — from simple Text and Metric components to complex Data Tables, Charts, or even another Dynamic Component.
* **Footer Slot:** The `footer` slot is ideal for adding action links (such as "View All") or summary information.
### Set Component Visibility
All components support conditional visibility — see [Component Visibility](/dynamic-components/core-concepts/component-visibility.md).
## Use Cases
### Building a "Key Metric" Widget
1. **Add a Card:** Drag a Card component onto the canvas.
2. **Configure the header:**
* Set the **Title** to "Quarterly Sales Performance".
* Set the **Icon Name** to `standard:dashboard`.
* Drag a **Button Menu** into the `actions` slot with options like "Refresh" and "Export".
3. **Add content:**
* Drag a **Metric** component into the main content slot and configure it to show total sales revenue.
* Drag a **Chart** component below the Metric (still inside the content slot) to show a sales trend line.
4. **Add a footer:**
* Drag a **Text** component into the `footer` slot and set its value to display a link like "View Full Report".
**Result:** You've quickly assembled a self-contained, organized dashboard widget with a clear title, actions, and multiple components inside.
**Key considerations**
* **As a container:** The Card's primary role is to organize content and provide a visual frame. Its power is realized by the components you place *inside* its slots.
* **Layout:** Combine Cards with the **Columns** component to create sophisticated, grid-based page layouts.
## Styling
The Avonni Card offers extensive styling options to help you integrate it into your page. Configure them from the **Style** tab of the Edit Card panel.
{% tabs %}
{% tab title="Margin" %}
Controls the *outer* spacing around the entire card.
* **Top / Right / Bottom / Left:** Adjust the space on each side of the card.
{% endtab %}
{% tab title="Padding" %}
Controls the *inner* spacing inside the card.
* **Top / Right / Bottom / Left:** Adjust the inner spacing on each side.
{% endtab %}
{% tab title="Size" %}
Controls the card's dimensions.
* **Width / Height:** Set fixed dimensions for the card.
* **Overflow:** Control how content that exceeds the bounds is handled.
* **Min Width / Max Width / Min Height / Max Height:** Constrain the size within bounds.
{% endtab %}
{% tab title="Header" %}
* **Background Color:** Set the header background color.
* **Text Color:** Adjust the color of the header text.
* **Font Size, Weight, and Family:** Fine-tune the header typography.
* **Border Bottom:** Customize the size and color of the header's bottom border.
{% endtab %}
{% tab title="Media" %}
* **Width & Height:** Set the dimensions of the media area.
* **Object Fit:** Control how the image fills its area.
* **Border Size & Color:** Customize the border around the media.
{% endtab %}
{% tab title="Border" %}
* **Color:** Set the border color for each edge of the card.
* **Size:** Adjust the border width for each edge.
* **Radius:** Round the card corners.
{% endtab %}
{% endtabs %}
---
# Agent Instructions
This documentation is published with GitBook. GitBook is the documentation platform designed so that both humans and AI agents can read, navigate, and reason over technical content effectively. Learn more at gitbook.com.
## Querying This Documentation
If you need additional information that is not directly available in this page, you can query the documentation dynamically by asking a question.
Perform an HTTP GET request on the current page URL with the `ask` query parameter, and the optional `goal` query parameter:
```
GET https://docs.avonnicomponents.com/dynamic-components/components/card.md?ask=&goal=
```
`ask` is the immediate question: it should be specific, self-contained, and written in natural language.
`goal` is optional and describes the broader end goal you are ultimately trying to accomplish on behalf of the user. GitBook uses it to tailor the answer towards what is most useful for that goal.
The response will contain a direct answer to the question and relevant excerpts and sources from the documentation.
Use this mechanism when the answer is not explicitly present in the current page, you need clarification or additional context, or you want to retrieve related documentation sections.
.gif?alt=media)
 {% endhint %}
### Media
Expand the **Media** section to make your Card more visually engaging with an image.
* **Source:** Provide the URL of the image to associate with the card. You can select from supported image formats including PNG, JPG, GIF, SVG, WebP, and AVIF.
* **Position:** Choose how the image is displayed relative to the card content:
* **Left**, **Top** (default), **Right**, **Bottom**: Places the image alongside the main content area.
* **Center**: Centers the image within the card.
* **Background**: Uses the image as a background for the entire card.
* **Overlay**: Overlays the image on top of the card's content.
{% endhint %}
### Media
Expand the **Media** section to make your Card more visually engaging with an image.
* **Source:** Provide the URL of the image to associate with the card. You can select from supported image formats including PNG, JPG, GIF, SVG, WebP, and AVIF.
* **Position:** Choose how the image is displayed relative to the card content:
* **Left**, **Top** (default), **Right**, **Bottom**: Places the image alongside the main content area.
* **Center**: Centers the image within the card.
* **Background**: Uses the image as a background for the entire card.
* **Overlay**: Overlays the image on top of the card's content.
.gif?alt=media)
.gif?alt=media)