# How to Build a Record Edit Form for modals & panels
## Overview
Learn to build a no-code record edit form designed to be launched in a modal or side panel. This tutorial focuses on the essential pattern of using the **"On Load" interaction** to pre-load a specific record's data based on a passed-in Record ID. This technique is crucial for any component that needs to fetch its data when opened in response to an interaction.
**Key Concepts You'll Use:**
* **Input Variable:** To receive the ID of the record that needs to be edited.
* **"On Load" with "Get Records":** To fetch the record's data *before* the form is shown.
* **Record Variable:** To hold the fetched record's data for editing.
* **Fields Tab:** To quickly build the form with pre-bound input fields.
* **"Update Record" Interaction:** The action that saves the changes to Salesforce.
## Guided Steps
{% stepper %}
{% step %}
### Create Your Input and Record Variables
First, we need two key variables: one to receive the incoming Record ID and another to hold the complete record data for editing.
* **Open/Create Dynamic Component:** Start with a new Dynamic Component.
* **Go to Resources:** In the Component Builder, click the **Resources** icon.
* **Add Input Variable:** Create a new **Variable** resource.
* **API Name:** `inputRecordId`
* **Data Type:** `Text`
* **Available for Input:** ☑️ **Checked**. This is essential so another component can pass a Record ID *into* this one.
* **Add Record Variable:** Create a second **Variable** resource.
* **API Name:** `recordToEdit`
* **Data Type:** `Record`
* **Object API Name:** Choose the Salesforce **Object** you intend to edit (e.g., `Contact`).
{% endstep %}
{% step %}
### Add an "On Load" Interaction to Fetch Record Data
{% hint style="warning" %}
## **Important Context: Why This Method is Used**
It's crucial to understand why we use the **"On Load"** interaction here. When a component is opened in a modal, it doesn't automatically know which record to edit. We must *pass* it the Record ID. The **"On Load"** interaction then uses this passed-in ID to fetch the record's data *before* the form appears.
This is different from placing a component directly on a record page. In that scenario, setting the [**Target Page Name**](https://app.gitbook.com/s/ODPvvv7Cx9Z9RECLn3oV/getting-started/understanding-the-essentials/target-page-object) is often enough to access the current record's data automatically via `$Component.record`, making this specific "On Load" step unnecessary. This tutorial focuses on the powerful and common modal/panel use case.
{% endhint %}
This crucial step fetches the correct record's data *before* the edit form is displayed to the user.
1. **Access Interactions:** In the Properties Panel for your *top-level* Dynamic Component, find the **Interactions** section.
2. **Add "On Load" Action:** Click "Add Action" under the **On Load** event.
3. **Choose "Get Records":** Set the **Action Type** to `Get Records`.
4. **Configure the Action:**
* **Record Variable:** Select your `{!recordToEdit}` variable.
* **Object API Name:** Select the same object you chose for your Record Variable (e.g., `Contact`).
* **Record ID:** Bind this to your input variable: `{!inputRecordId}`.
{% endstep %}
{% step %}
### Build the Edit Form Layout
Now we'll visually create the form using a Card and the Fields Tab, which is now aware of your Record Variable.
1. **Add the Card Container:** From the Component Library, drag a **Card** component onto your canvas and give it a **Title** (e.g., "Edit Contact").
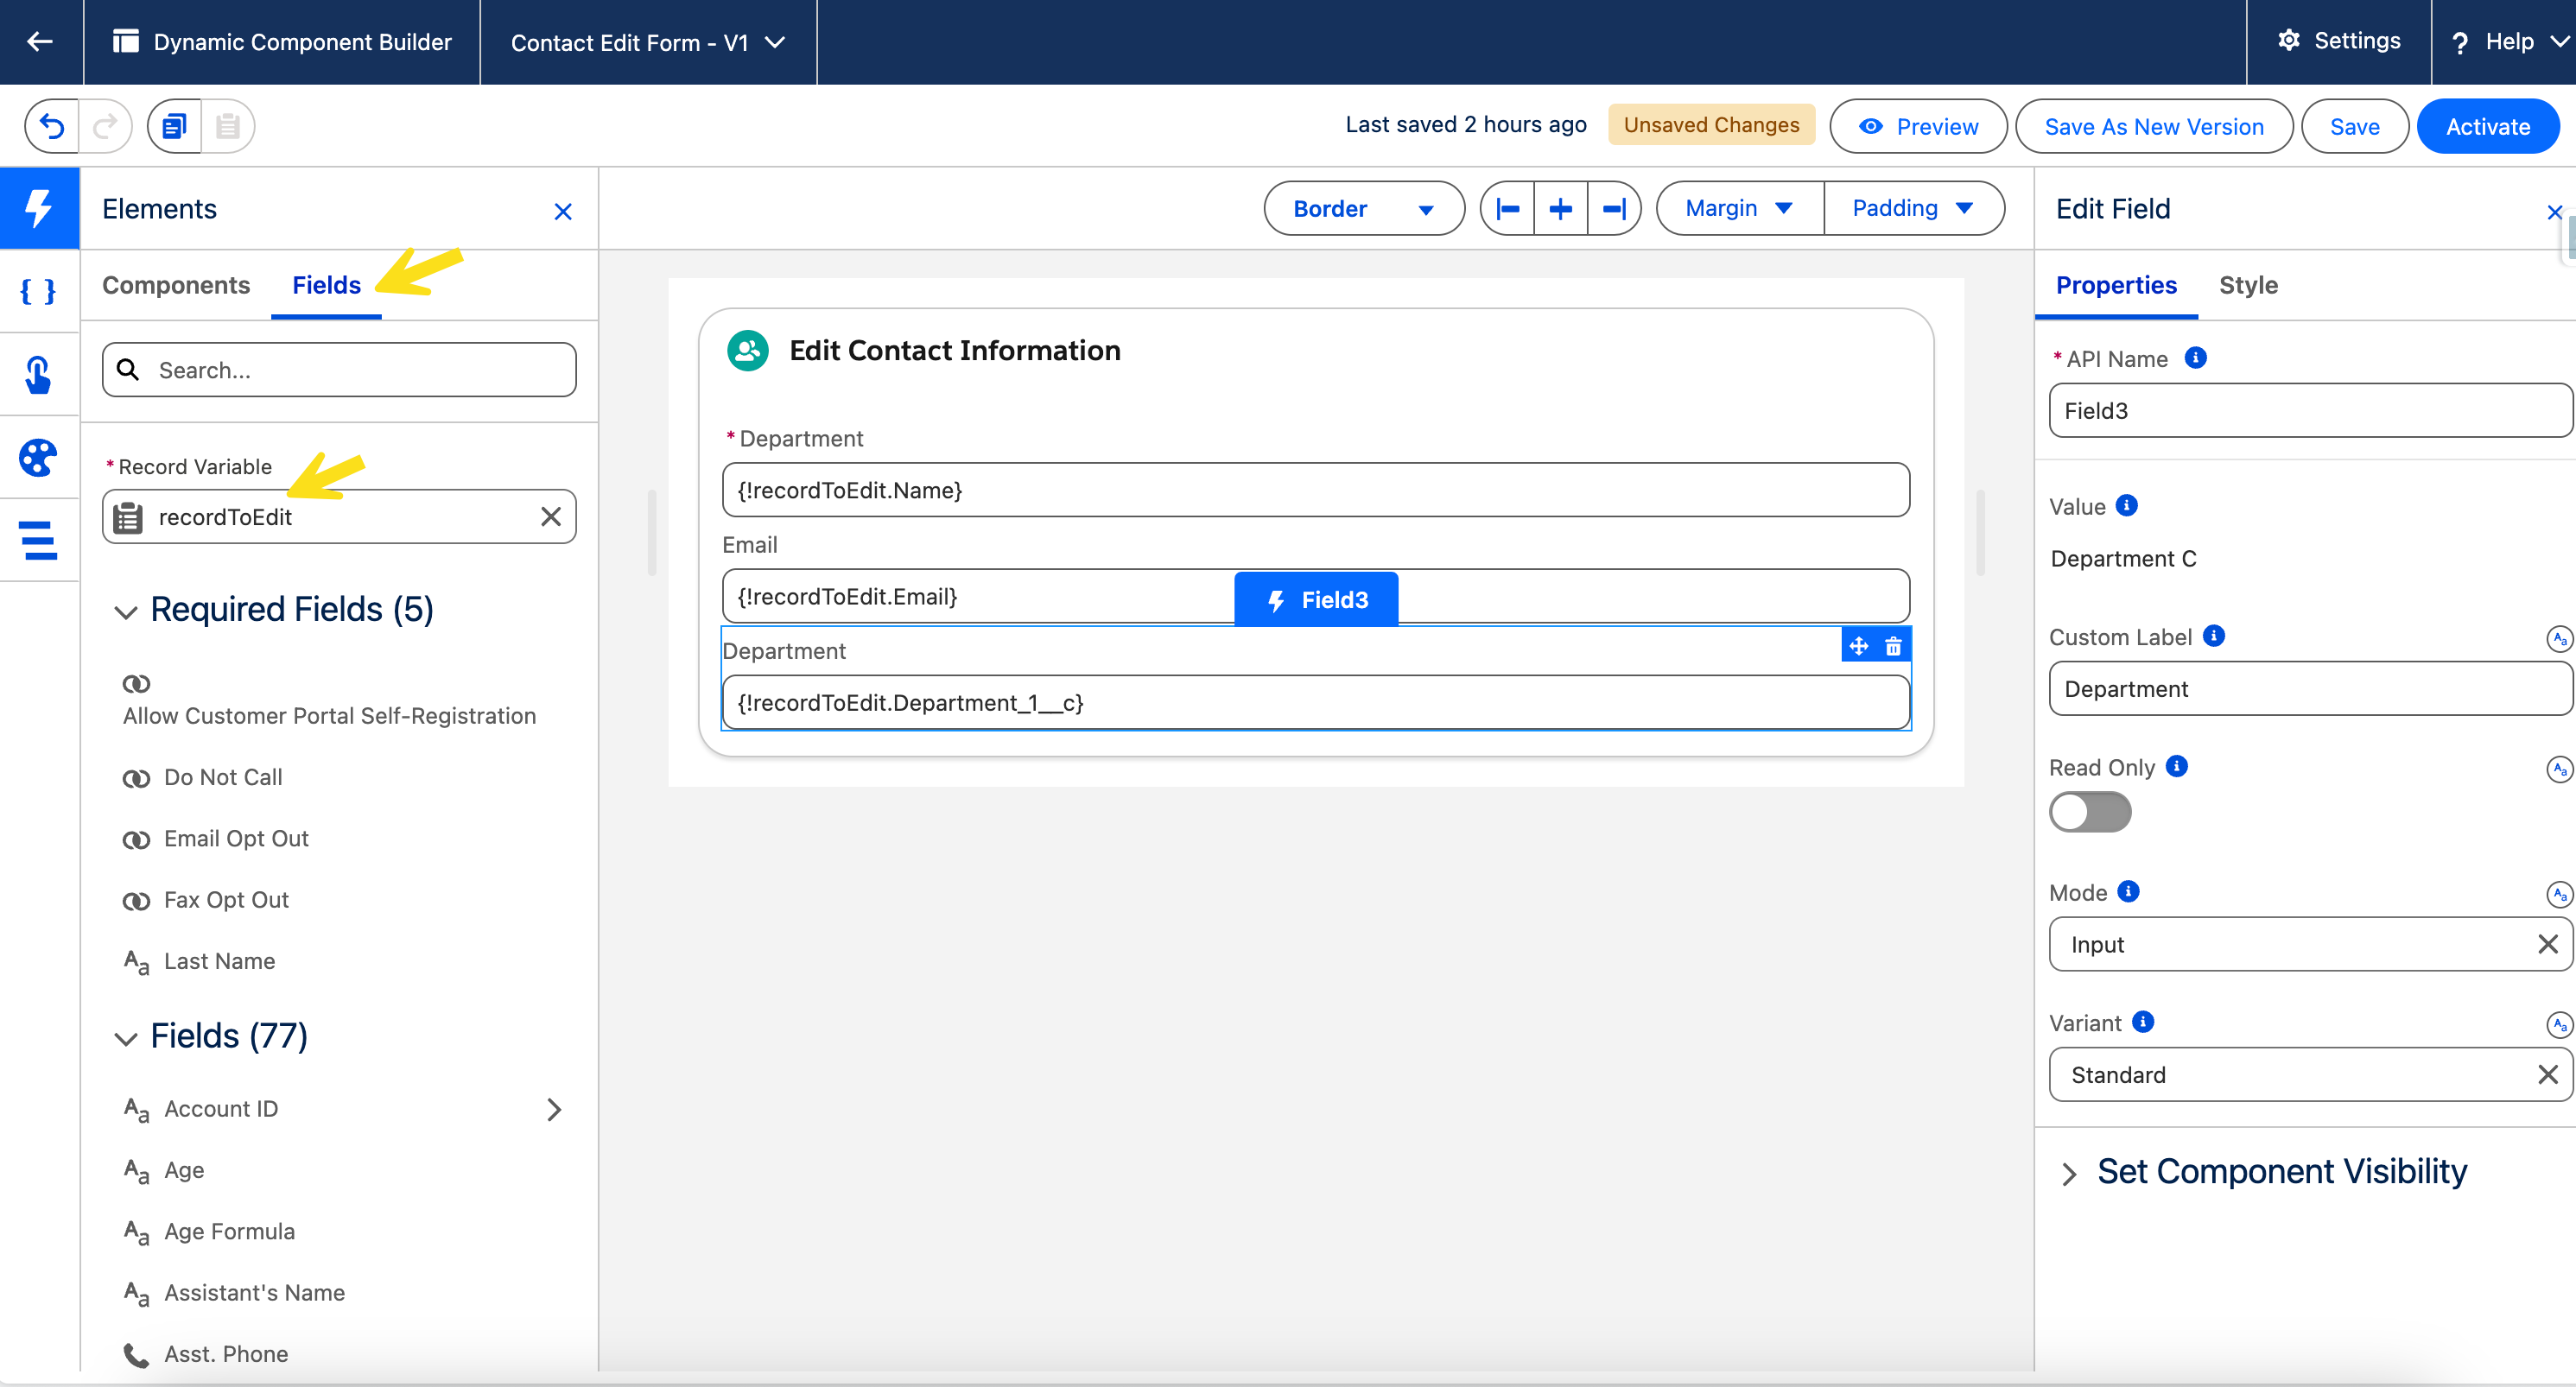
2. **Populate the Form Using the Fields Tab:**
* Go to the **Component Library** (left panel) and click on the **Fields** tab.
* From the dropdown, select your **Record Variable** (`recordToEdit`).
* The Fields tab will now show the fields from your chosen Salesforce object. Drag the desired fields one by one *directly into the Card*.
* Avonni automatically creates the correct pre-bound input component for each field (e.g., a Text Input for `FirstName`, an Email Input for `Email`).
{% hint style="success" %}
## Pro Tip: Displaying Fields from Related Records
You can also display fields from related parent records. In the **Fields Tab**, any lookup relationship field (like `AccountId` or a custom lookup) will have an arrow next to it. Clicking this arrow expands the relationship, allowing you to see and drag fields from the related object directly onto your component.
{% endhint %}
{% endstep %}
{% step %}
### Add and Configure the "Save" Button
Finally, we need a button for users to save their changes.
* **Add and Style the Button:** Drag an Avonni **Button** into your Card in the footer section, below the input fields. In its Properties Panel, set the **Label** to "Save Changes" and the **Variant** to `brand`.
* **Configure the "Update Record" Interaction:**
* With the Button selected, go to the **Interactions** section.
* Add a new interaction for the **On Click** event.
* **Action Type:** Choose **Record Variable Operations > `Update Record`**.
* **Record Variable:** In the action's settings, select your `{!recordToEdit}` variable. This tells the interaction which variable holds the updated data to save back to Salesforce.
{% endstep %}
{% endstepper %}
## How This Component is Used
You would typically launch this "Edit Form" Dynamic Component from another component (like a Data Table) using the **"Open Dynamic Component Dialog"** interaction. In that interaction, you would pass the `Id` of the selected row from the Data Table into the `inputRecordId` variable of this component, triggering the entire process


.gif?alt=media&token=ea328f3e-57cd-45da-bd76-78262ce36db3) {% endhint %}
{% endstep %}
{% step %}
### Add and Configure the "Save" Button
Finally, we need a button for users to save their changes.
* **Add and Style the Button:** Drag an Avonni **Button** into your Card in the footer section, below the input fields. In its Properties Panel, set the **Label** to "Save Changes" and the **Variant** to `brand`.
{% endhint %}
{% endstep %}
{% step %}
### Add and Configure the "Save" Button
Finally, we need a button for users to save their changes.
* **Add and Style the Button:** Drag an Avonni **Button** into your Card in the footer section, below the input fields. In its Properties Panel, set the **Label** to "Save Changes" and the **Variant** to `brand`.

