# Build a "Quick Lead" Entry Form
## **Overview**
Do you need a fast way for your team to capture new leads without having to navigate away from their current page? This tutorial guides you through creating a **"Quick Lead Capture" form** using Avonni Dynamic Components.
We will build a simple, focused form with just the essential fields (like First Name, Company, and Lead Source) that you can place directly on a Salesforce Home Page or App Page. You'll learn how to use a **Record Variable** to hold the data temporarily, the **Fields Tab** to quickly drag-and-drop pre-bound input fields, and the **"Create Record"** interaction to save the new lead directly to Salesforce – all built visually, without writing any code.
***
## Guided Steps
{% stepper %}
{% step %}
### Create a Record Variable
This variable will temporarily store the information users enter into the form before it's saved to Salesforce.
1. **Open/Create Dynamic Component:** Start with a new or existing Dynamic Component.
2. **Go to Resources:** In the Component Builder, click the **Resources** icon in the left panel.
3. **Add New Variable:** Click the "+" button or "New Resource" and select **Variable**.
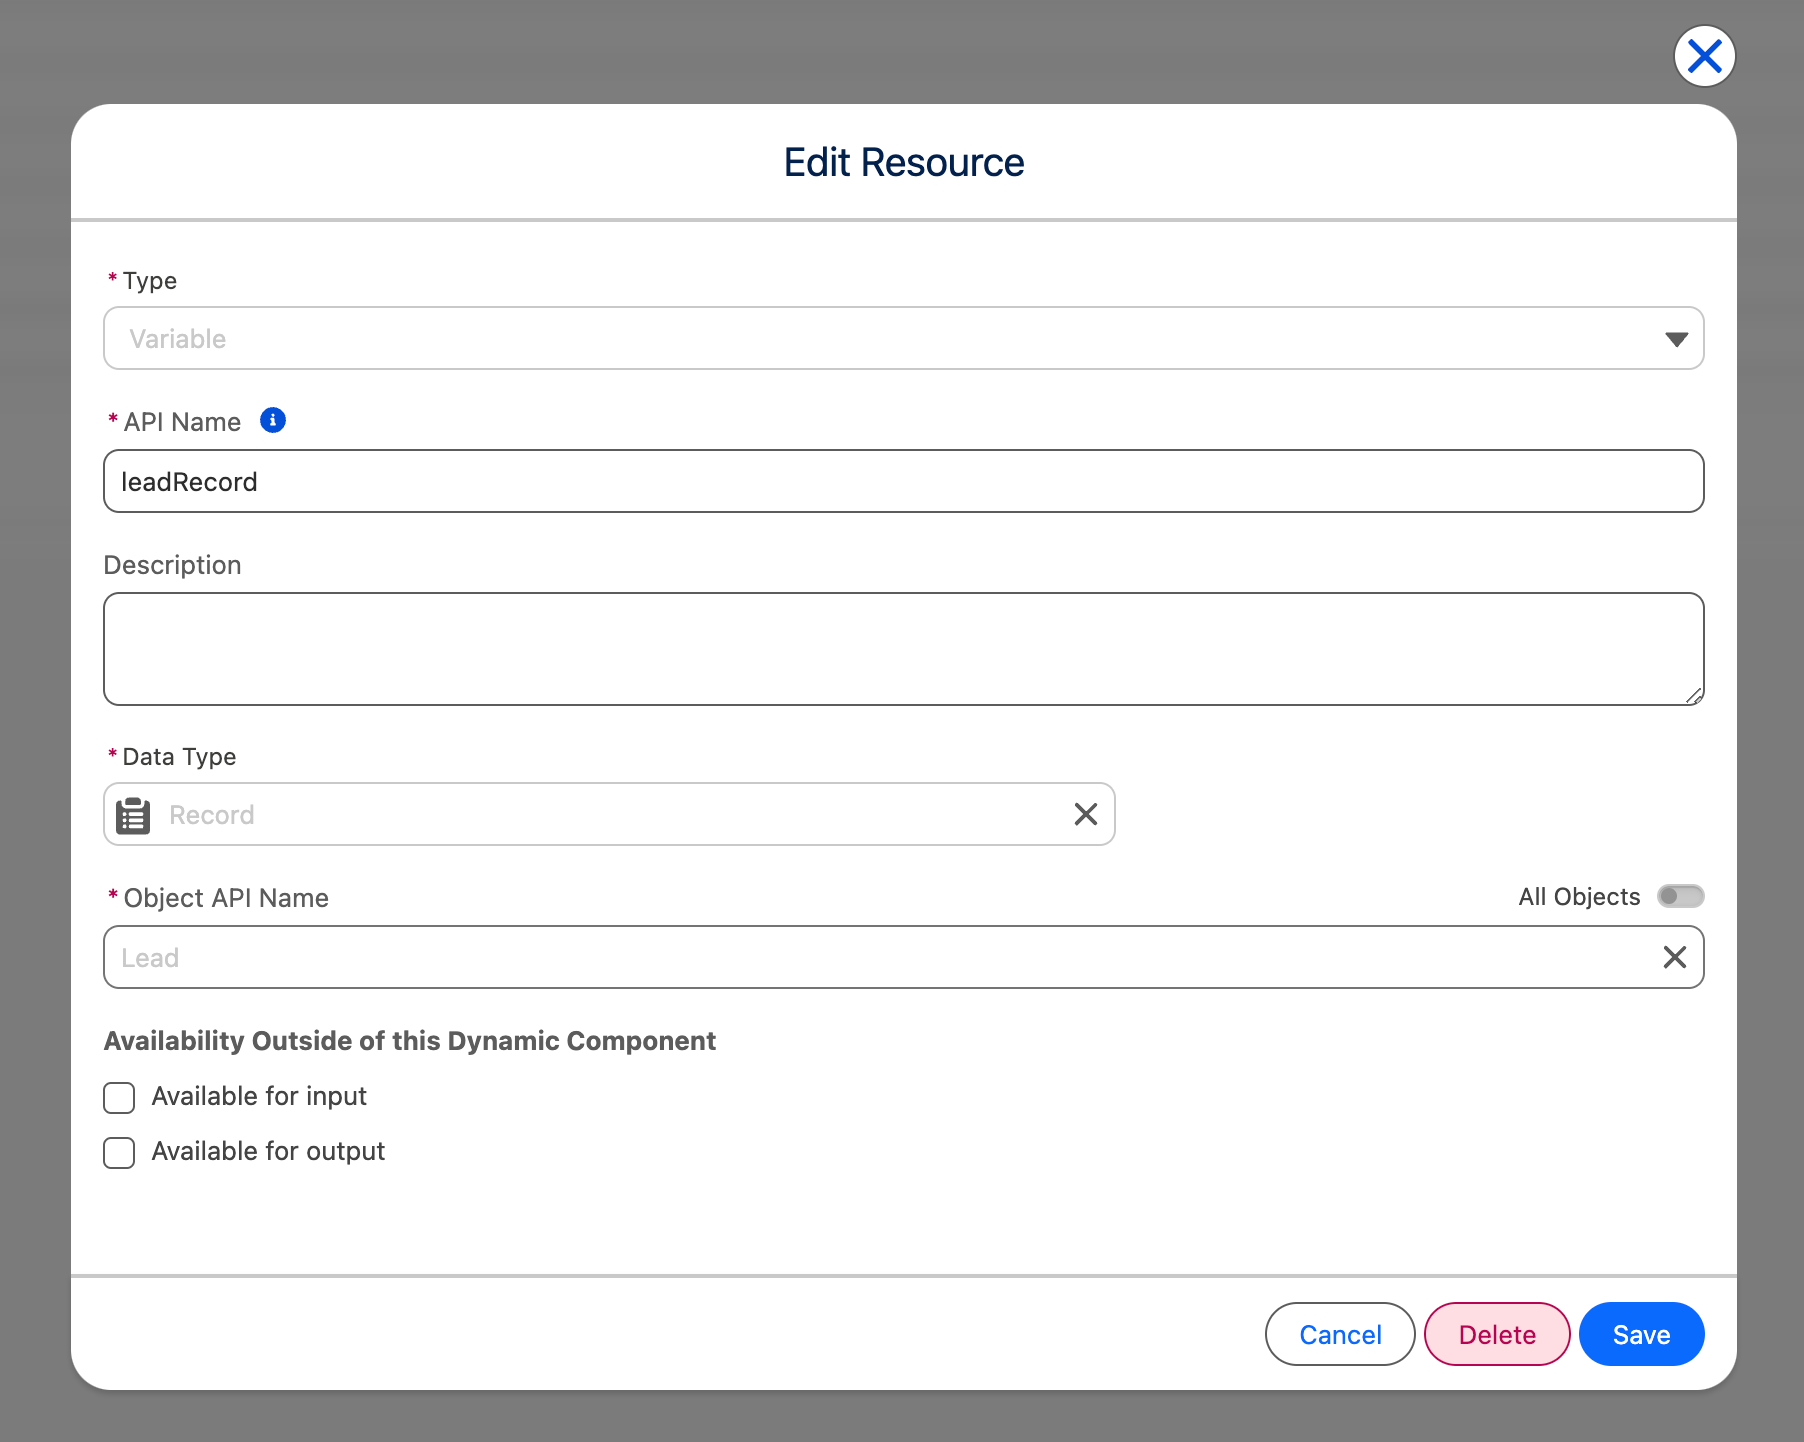
4. **Configure the Variable:**
* **API Name:** Give it a descriptive name (e.g., `newLeadForm`, `contactEntryData`).
* **Data Type:** Select **Record**.
* **Object API Name:** From the dropdown, choose the Salesforce **Object** where the form data will ultimately be stored (e.g., `Lead`, `Contact`, `My_Custom_Object__c`).
5. **Save** the Variable resource.
{% endstep %}
{% step %}
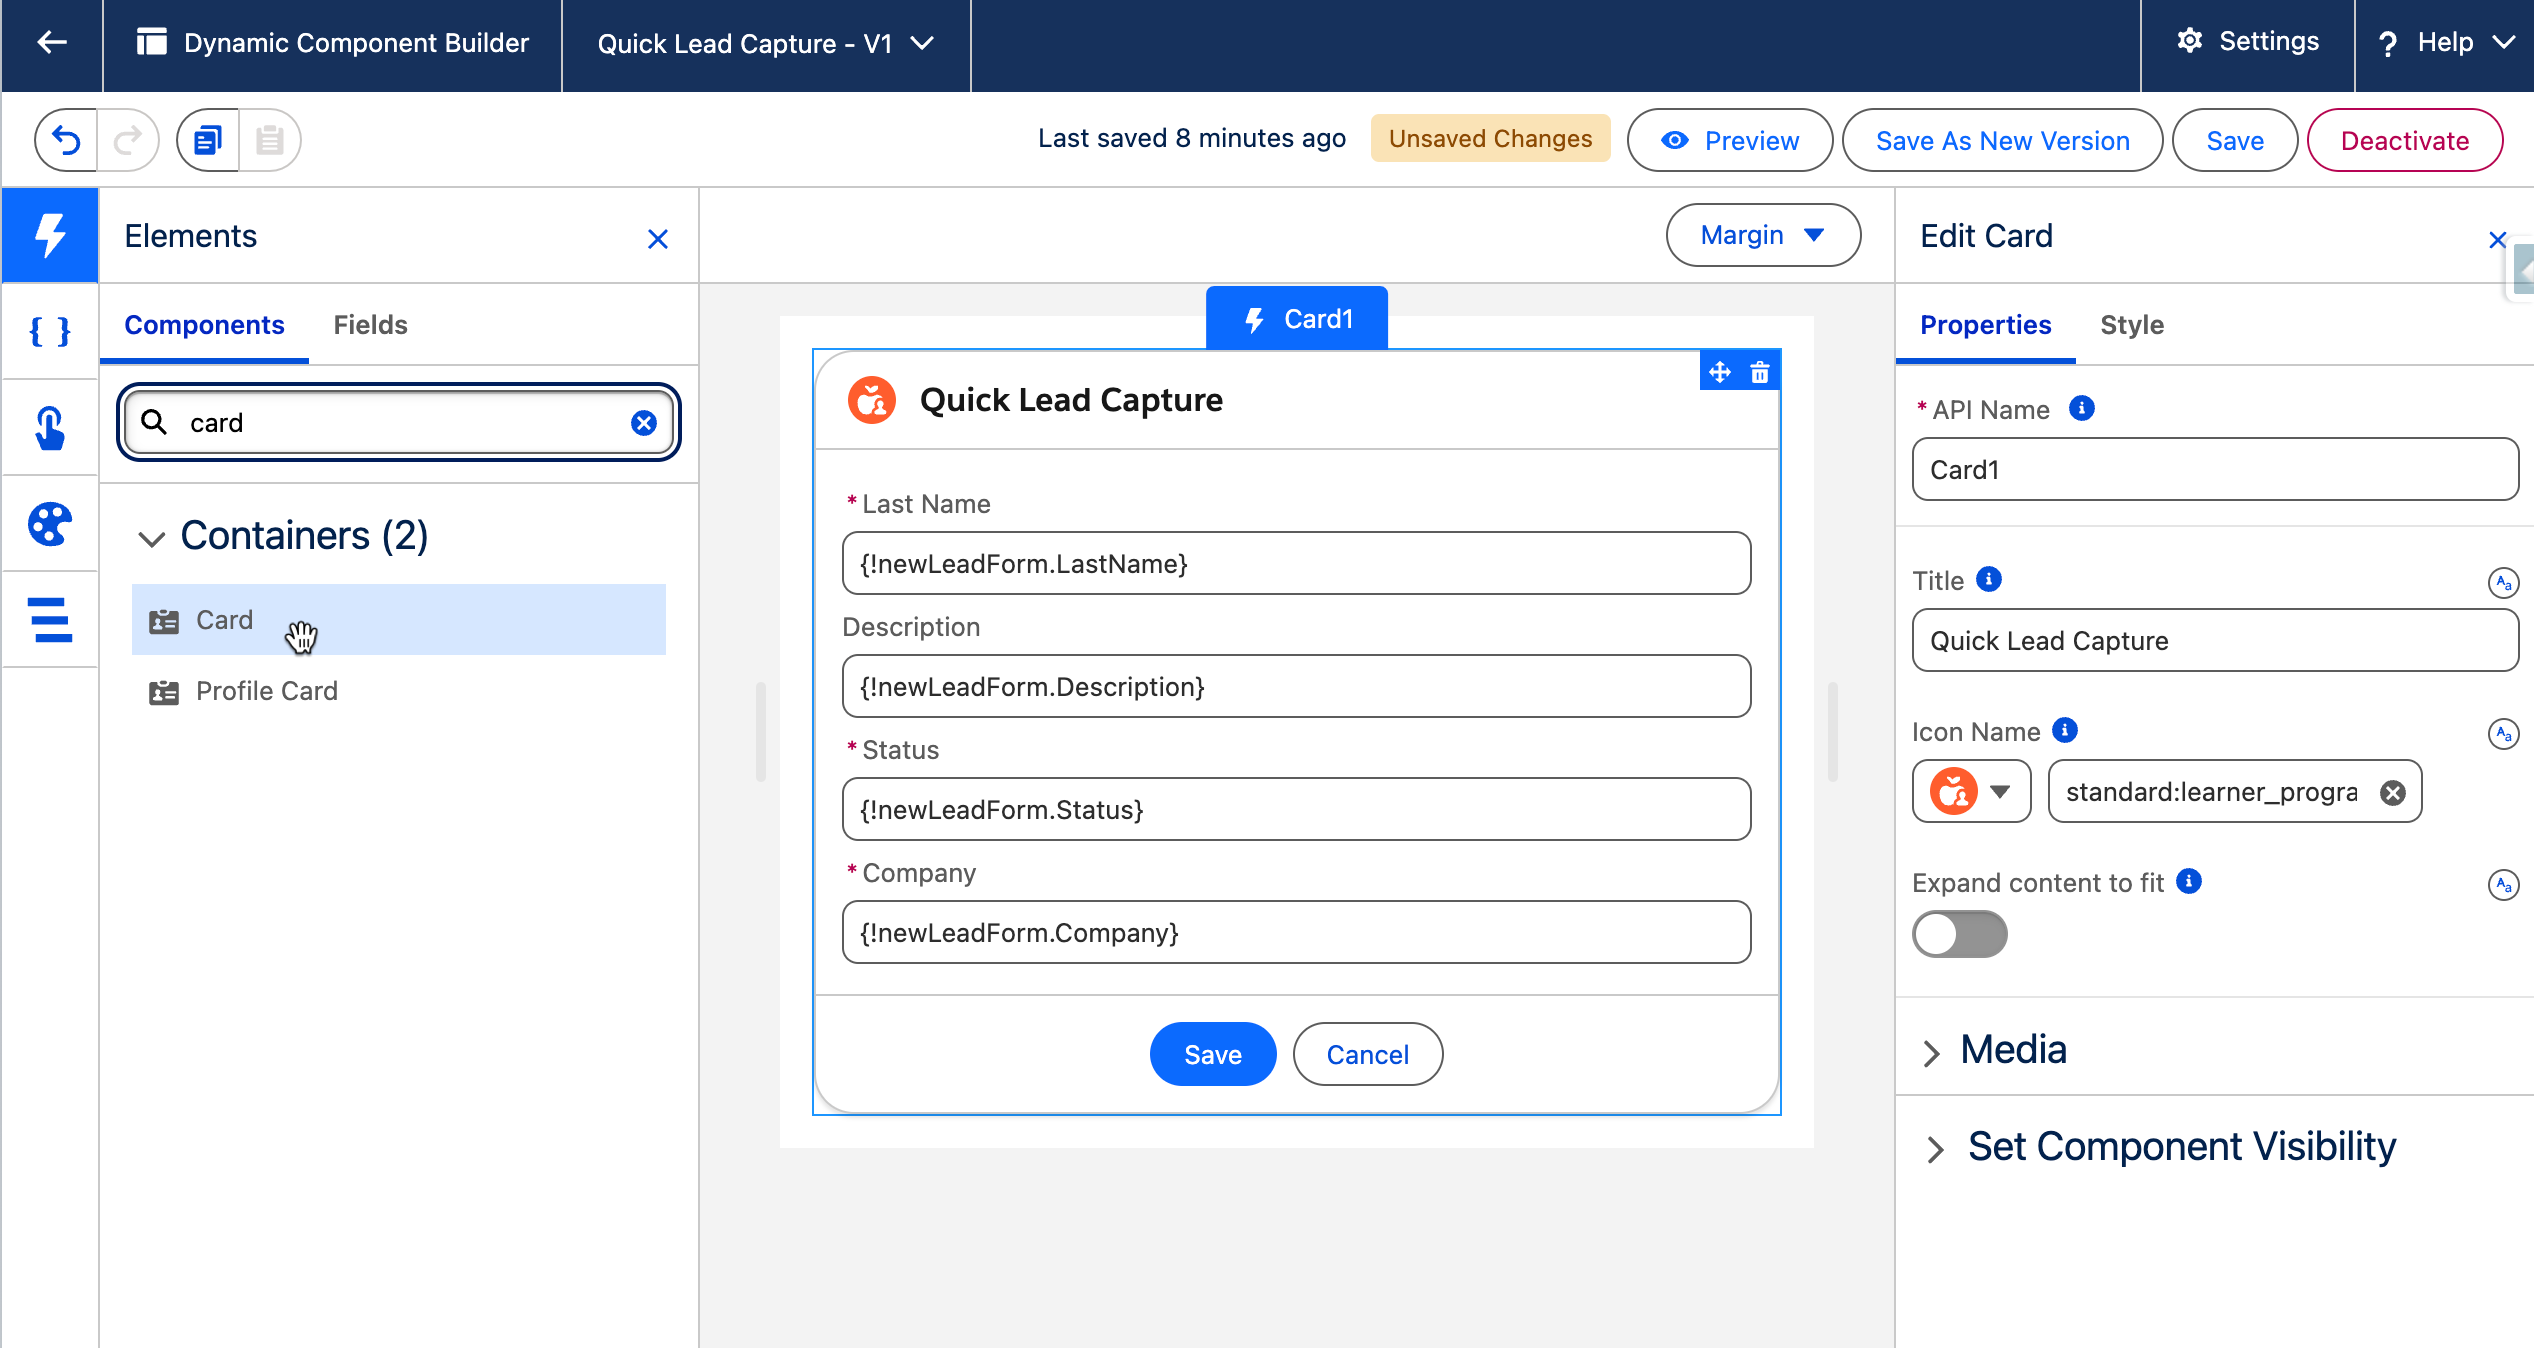
### Build the Form Layout with a Card and Fields
First, let's create a visual container for our form. We'll use an Avonni **Card** component to group all our input fields together. This gives the form a clean, structured look and makes it easy to manage as a single unit.
* **Add the Card Container:**
* From the Component Library (left panel), drag a **Card** component onto your canvas.
* Select the Card and, in the Properties Panel (right panel), give it a **Title** (e.g., "New Lead Entry").
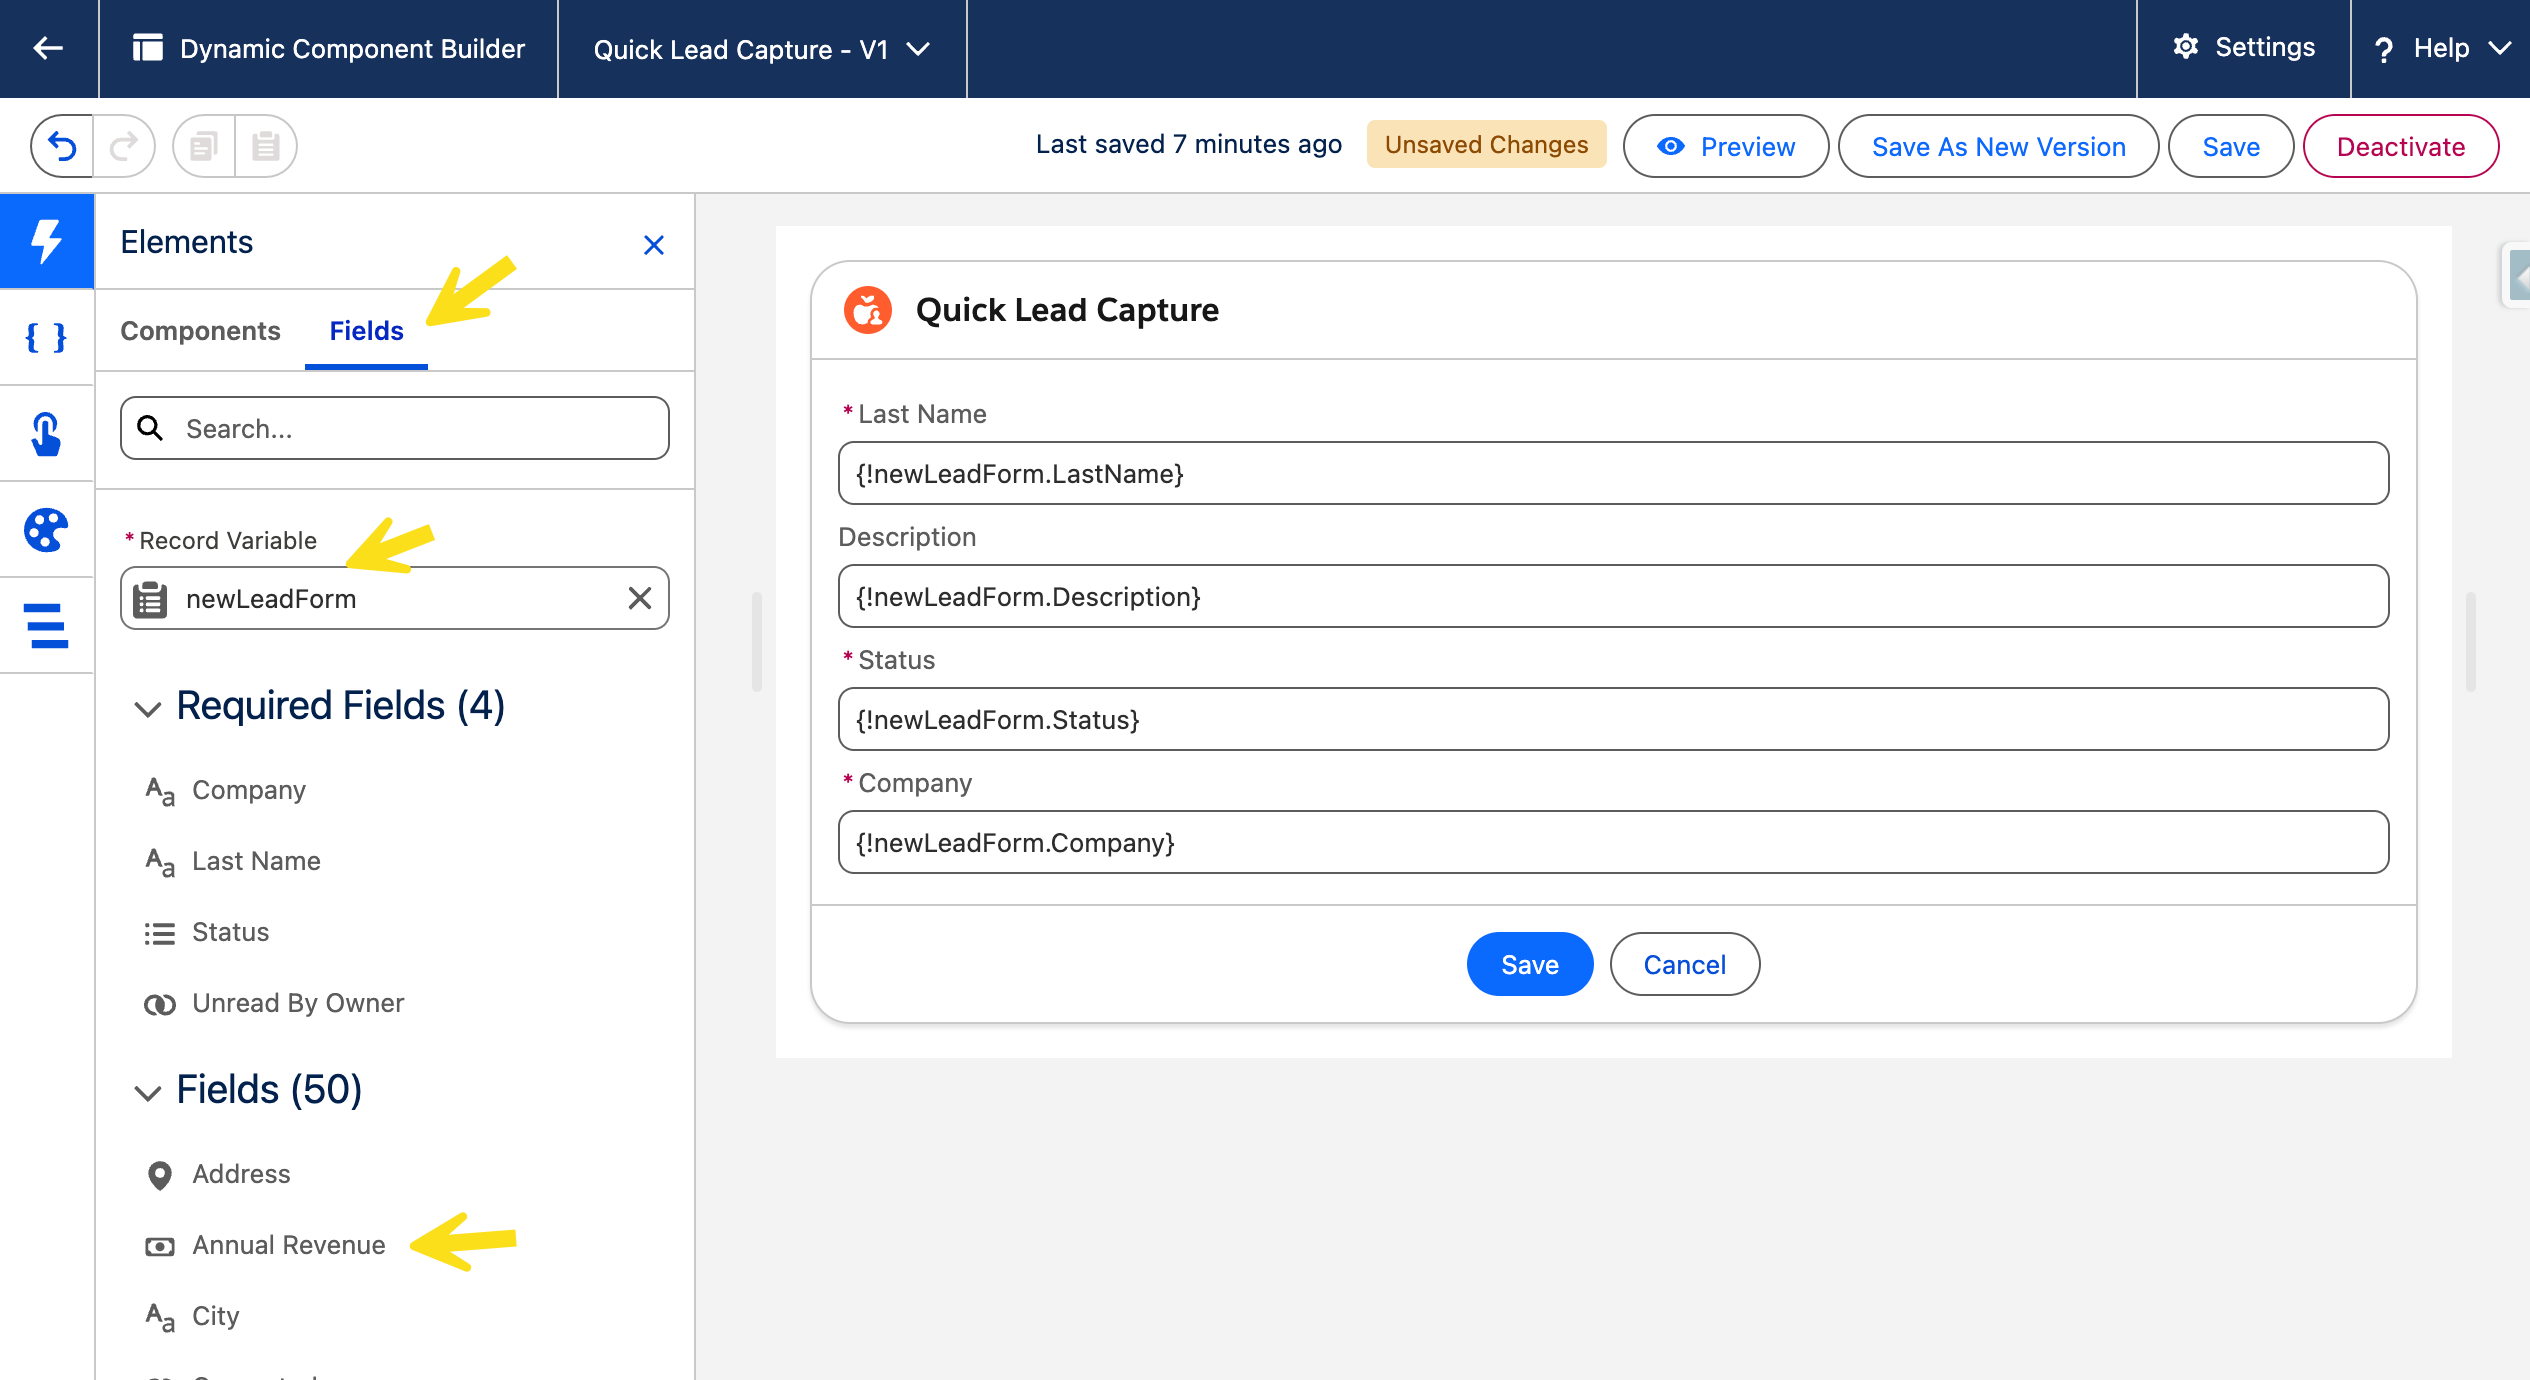
* **Populate the Form Using the Fields Tab:**
* Now that we have our container, let's add the input fields using the **Fields Tab**. This is a powerful shortcut that automatically creates and binds components for you.
* Go to the **Component Library** (left panel) and click on the **Fields** tab.
* You should see your Record Variable (e.g., `newLeadForm`) listed. Select it.
* The Fields tab will now display the fields from the Salesforce object you chose for your variable. Drag the desired fields one by one *directly into the content area of the Card* you just added.
**What Happens Automatically:**
When you drag a field from the Fields tab, Avonni Dynamic Components automatically creates the correct input component (e.g., a Text Input for a text field, a Combobox for a picklist) and **binds its `Value` to the corresponding field in your Record Variable**.
{% endstep %}
{% step %}
### Add and Configure the Submit Button
Now that we have our form fields arranged, we need a button for users to click to create the Salesforce record. This involves adding the button component and then configuring an "On Click" interaction to save the data from our Record Variable.
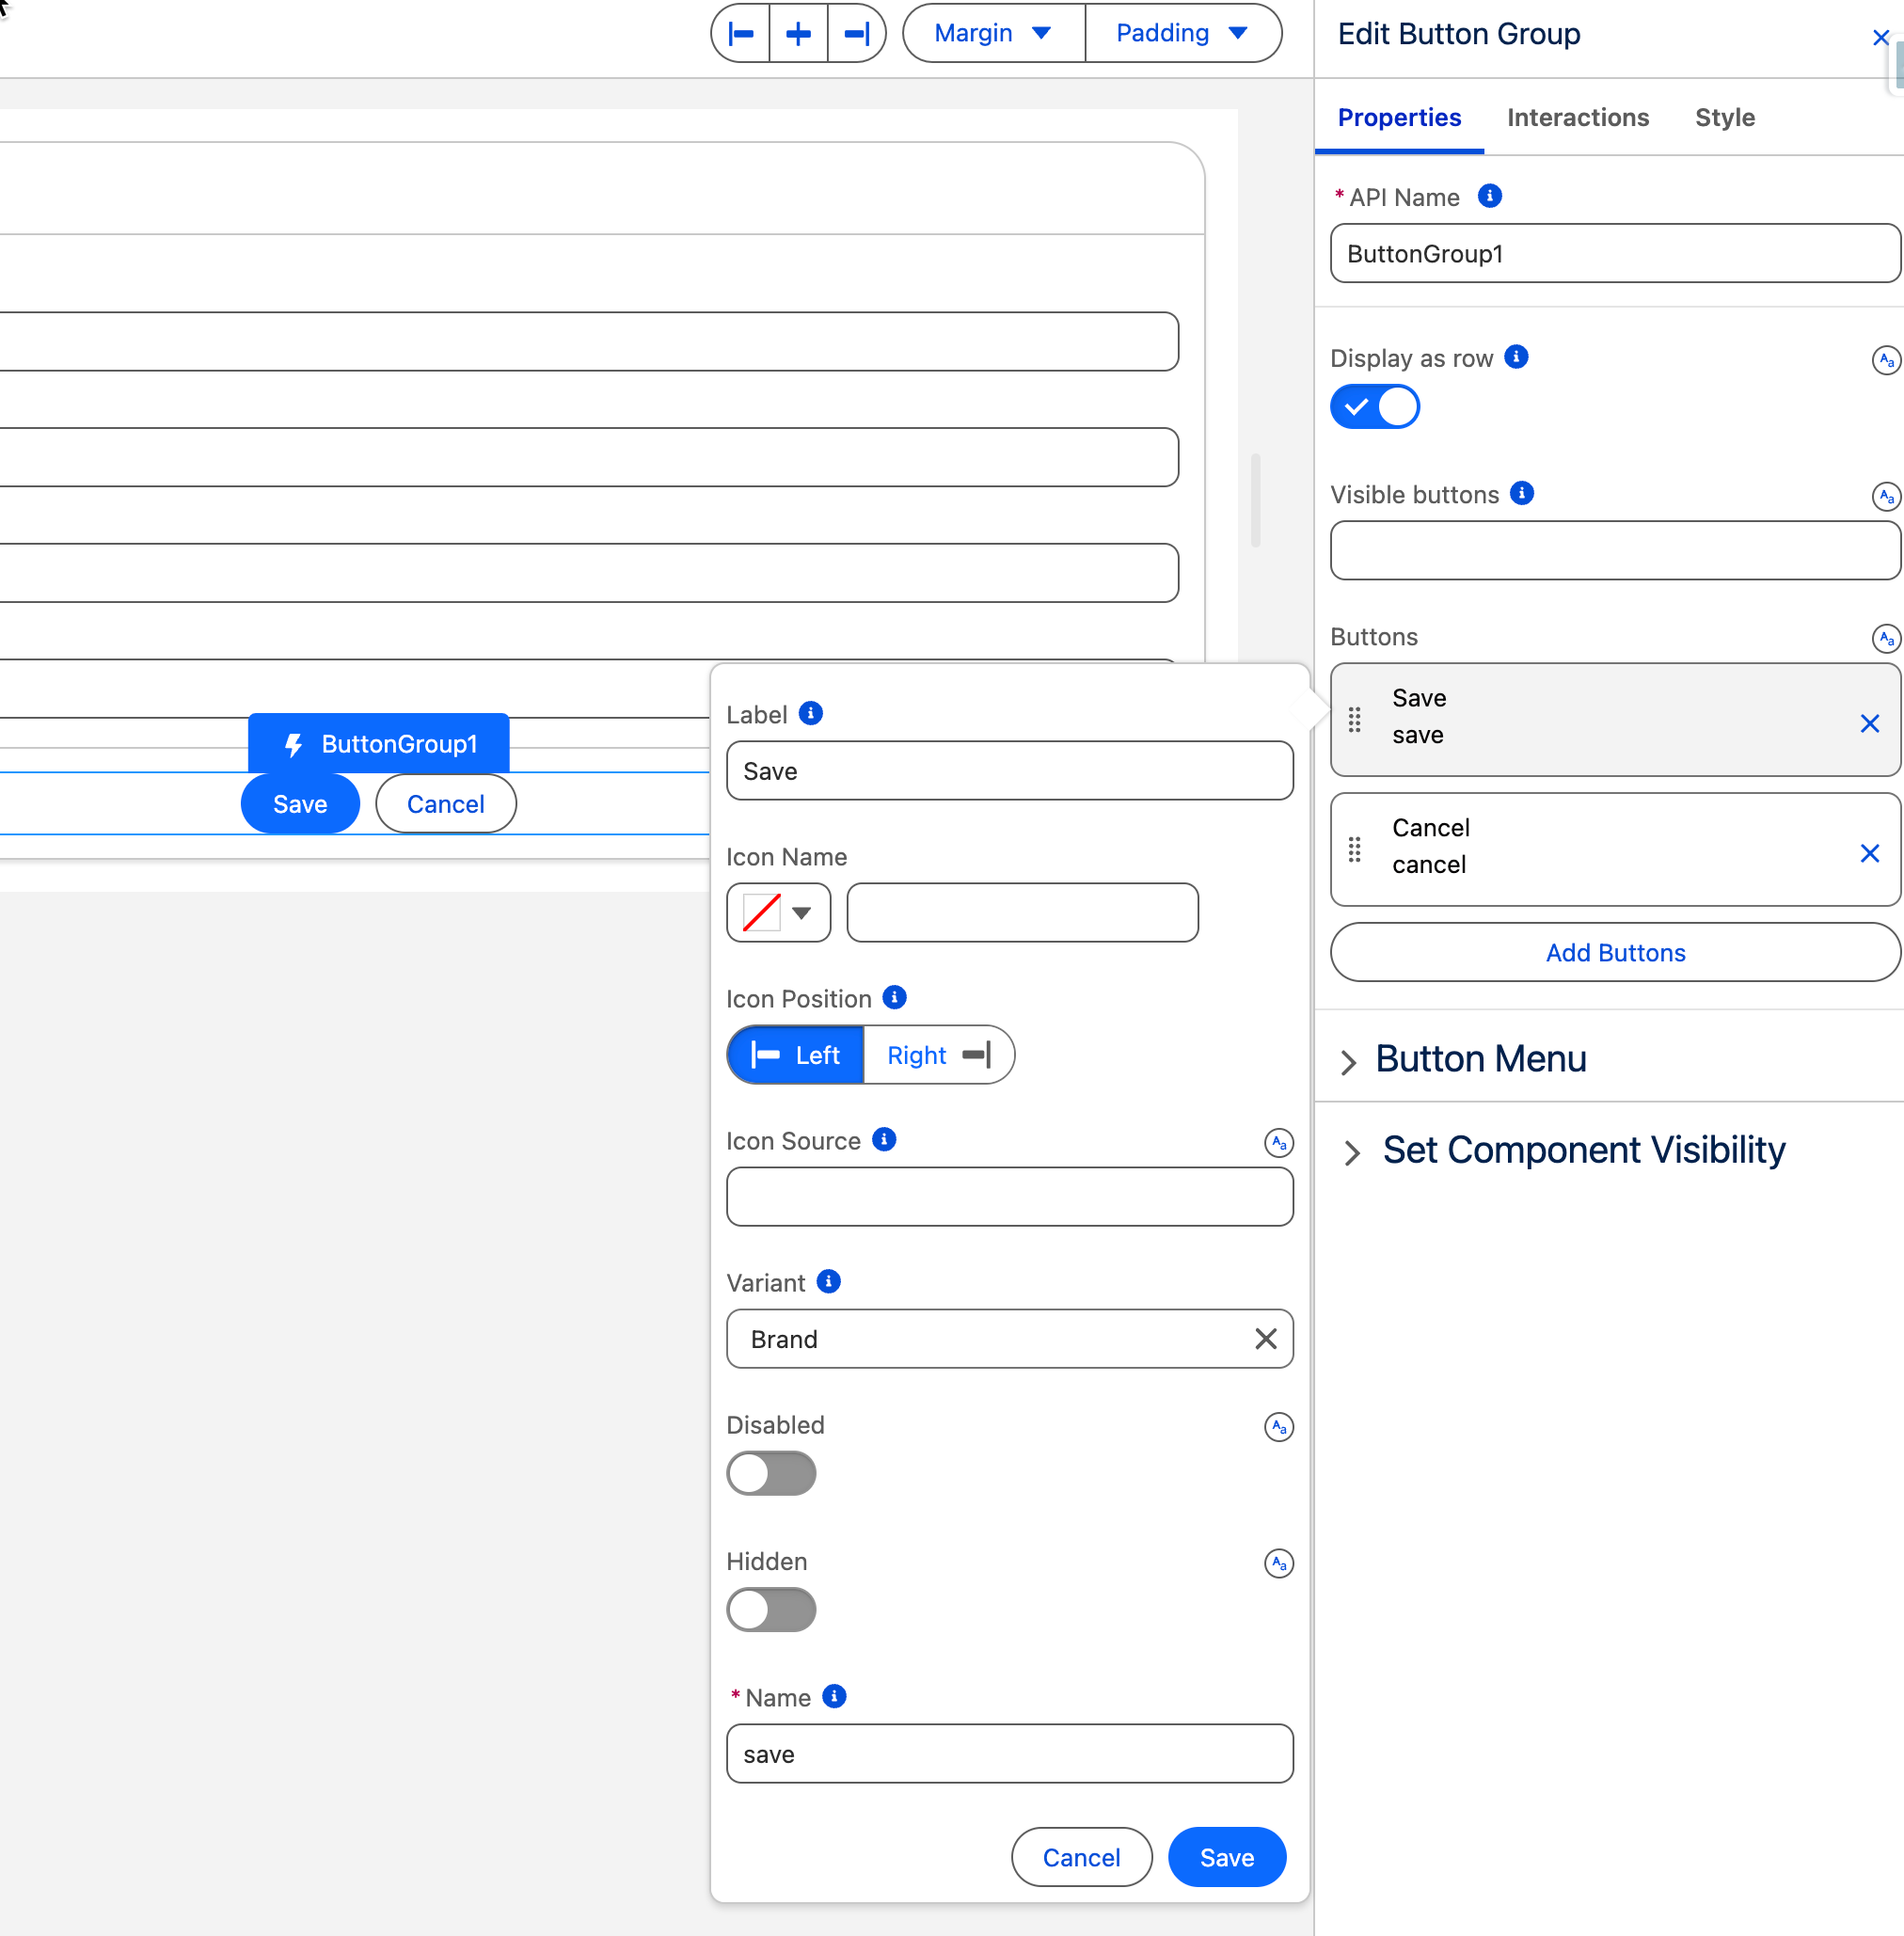
**1. Add and Style the Button:**
* From the Component Library, drag an Avonni **Button** component onto your canvas and place it inside your Card, typically below the last input field.
* Select the Button component.
* In the **Properties Panel** (on the right):
* **Label:** Set a clear, action-oriented label (e.g., "Submit Lead," "Create Contact," "Save").
* **Variant:** Choose a style to make the button stand out, such as `brand`.
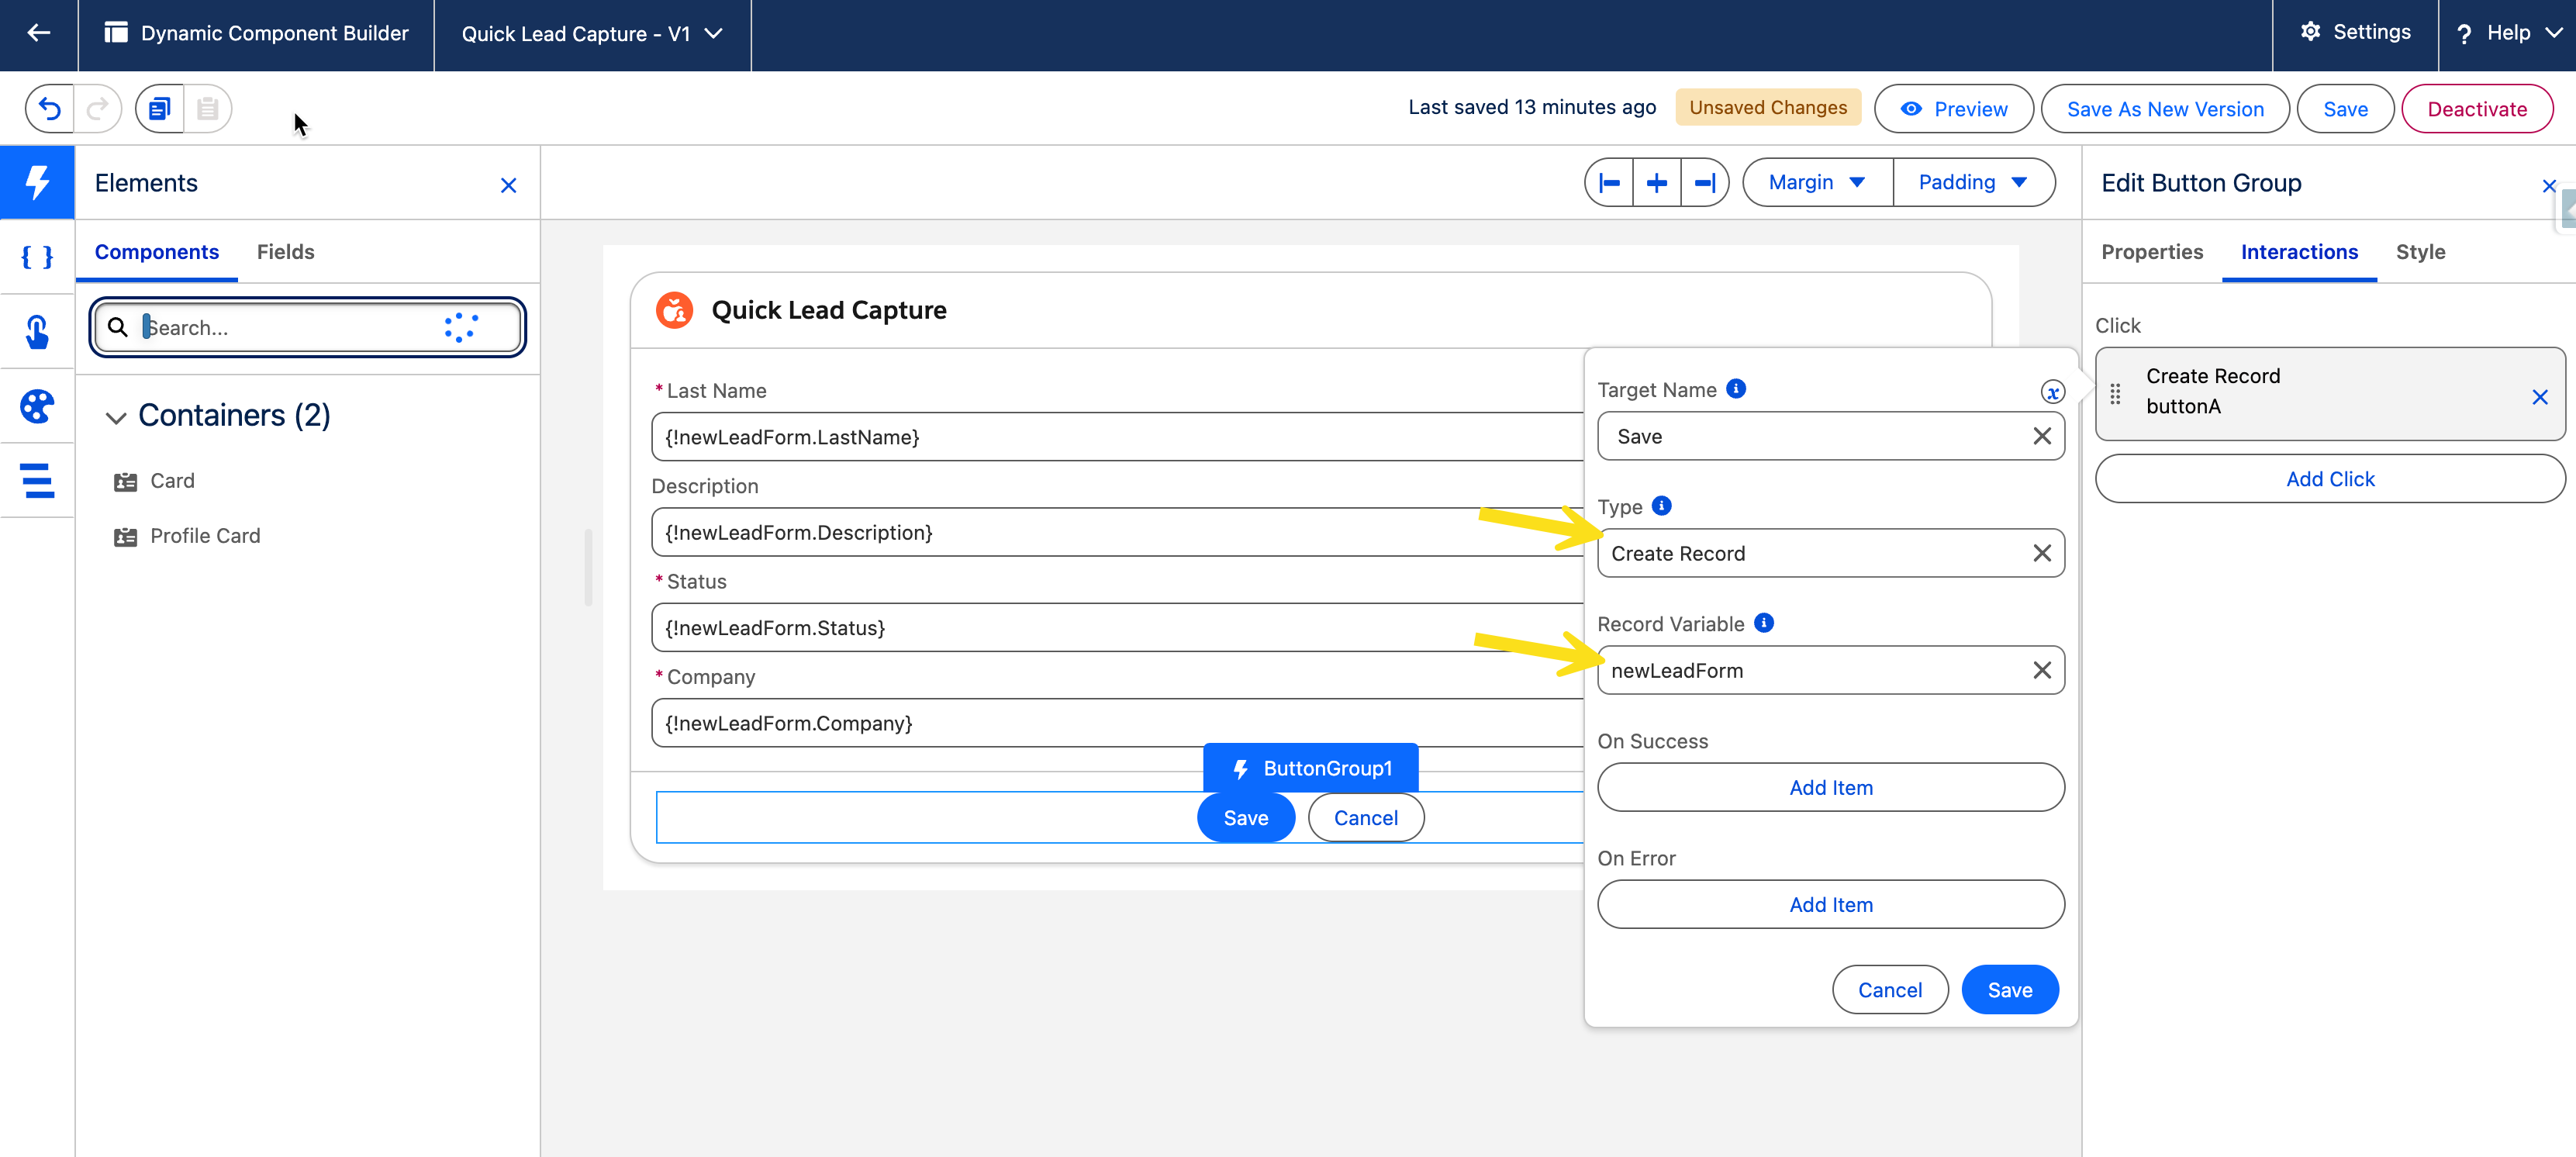
**2. Configure the "Create Record" Interaction:**
* With the Button still selected, find the **Interactions** section in the Properties Panel.
* Add a new interaction for the **On Click** event.
* In the interaction settings, click **"Add Action"**.
* For **Action Type**, select the category **Record Variable Operations**, and then choose the action **`Create Record`**.
* Now, configure the action's properties:
* **Record Variable:** Use the dropdown to select the Record Variable you created in Step 1 (e.g., `{!newLeadForm}`). This indicates the action that determines which variable holds the data for the new record.
**How it Works:** By selecting the `{!newLeadForm}` variable, you are instructing the interaction to automatically take **all the data** the user has entered into the form fields (which are bound to this variable) and use that data to create the new Salesforce record. No need to select individual fields – the component handles it for you
{% endstep %}
{% step %}
### Test Your Form
* **Save** your Dynamic Component.
* **Activate** it.
* **Place on a Page:** Using the Lightning App Builder, add the Dynamic Component to a relevant Lightning Page (App Page, Home Page).
* **Test:** Navigate to the page, fill out your custom form, and click the submit button. Verify that a new record is created in Salesforce with the information you entered
{% endstep %}
{% endstepper %}