# Display a list of contacts related to an account
## Overview
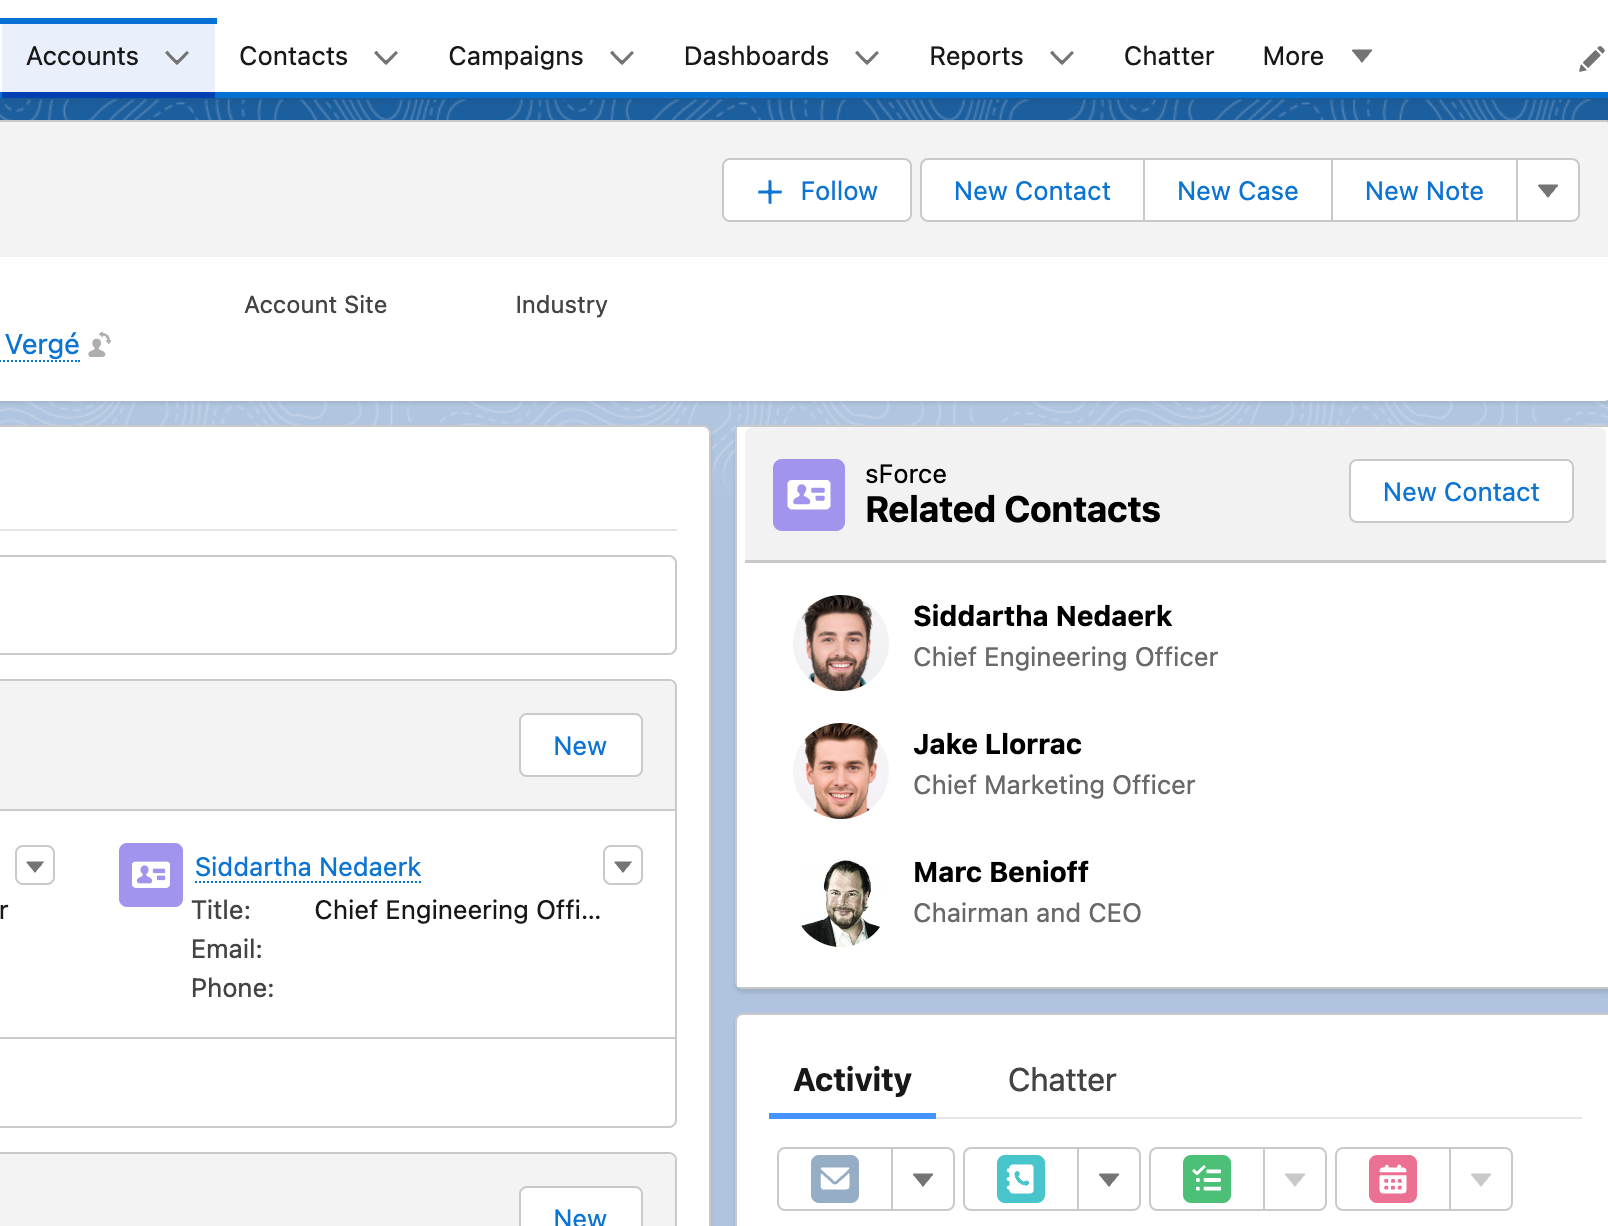
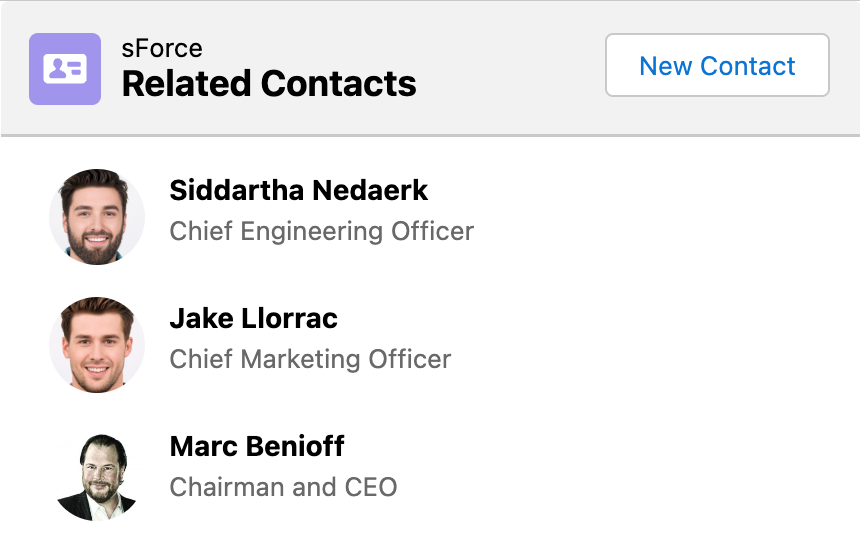
This tutorial will guide you through creating a screen flow using the [Avonni avatar group component](https://docs.avonnicomponents.com/flow/flow-components/avatar-group) to display a list of contacts related to a specific account.
{% hint style="info" %}
**This tutorial will cover:**
* [how to set up the flow](#set-up-our-flow)
* [add and configure the avatar group component](#configure-the-avonni-avatar-group-component)
* display contacts related to the account
* and activate and test the flow.
{% endhint %}
## Result
The result will be a functional screen flow that allows users to view a list of contacts related to a specific account in Salesforce with the help of the avatar group component.
{% hint style="info" %}
**PRO TIP**:
See the [suggestion for improvements section](#suggestion-for-improvements) to improve this example.
{% endhint %}
## Building our list of contact screen flow
### Set up our flow
#### Create the flow
Type Flow in the setup menu
* Click on the "**New Flow**" button to create a new flow
* Select "**Screen Flow**"
{% @arcade/embed flowId="qSuQYiG2FCYgKnf5UdOs" url="" %}
#### Create AccountID variable
Now we need to create an account variable to store accountID information. This is needed to display only contacts associated with a specific account.
* Click on the "**New Resource**" button
* Resource Type > **Variable**
* Enter an API Name: accountID
* In the **Data Type** dropdown, **select Record**
* Object: **Account**
* Check the "Available for input" checkbox
{% @arcade/embed flowId="0OLDE5oaGzHOXSsrIoTR" url="" %}
#### Create the Get Records element
We will create the Get Records collection to retrieve contact records using a filter.
* Add a "**Get Records**" element
* Enter an API Name
* Select the **Contact** object
* Filter Contact Records
* All Condition Are Met (AND)
* **`Field`** > AccountID
* **`Equals`**
* Our variable ID created in step 1 > {!accountID.Id
* Display "**All Records**"
* Click on the "**Done**" button
{% @arcade/embed flowId="Ct8C5WBhYgcY84mSUmFM" url="" %}
### Create the Screen Flow
#### General
* Add the **Screen element**
* **Enter a screen label**
* Hide Header and Footer (optional)
{% @arcade/embed flowId="1Imr9iGm6AbEoweOBItr" url="" %}
#### Add the Avatar Group Component
* Drag the [Avatar Group component](https://docs.avonnicomponents.com/flow/flow-components/avatar-group) from the custom list (or type Avatar Group from the search box)
* Set the following settings:
* **`Variant`**: Circle
* **`Size`**: Large
* **`Layout`**: List
* **Data source** > Variable
* **Data Mapping**
* **`Primary Text`**: Full name
* **`Secondary Text`**: Title
* **`Image Source`**: photo URL
{% hint style="info" %}
Fields name in the data mapping section might not be the same as yours.
{% endhint %}
* Click on the "Done" button to save the component
{% @arcade/embed flowId="11CHsNx2qN5Gs02D0OV6" url="" %}
## Add the flow to the Account page
We just finished building our screen flow. We can now save it and add it to an account page to test it.
{% @arcade/embed flowId="oduySlR1ZsilJ5gUClir" url="" %}
## Troubleshooting
#### Unable to see the records
Ensure your Get Records collection has the correct settings.
#### Unable to choose a source collection
Ensure your Get Records collection has the correct settings, especially the "How many records to store" section.
## Suggestion for improvements
### Add a Header Component
We can add the [Header component](https://docs.avonnicomponents.com/flow/flow-components/header) on our screen flow above the avatar group component. Add a title and an action to create a new record (New Contact.
### Redirect to the contact's page on click
Create an [interaction action](https://docs.avonnicomponents.com/flow/component-builder/interactions-panel) on avatar click with the following parameters:
* **Type**: Navigation
* **Page reference type**: Record Page
* **Object API name**: Contact
* **RecordID**: Item: Name
* **Action name**: View