> For the complete documentation index, see [llms.txt](https://docs.avonnicomponents.com/llms.txt). Markdown versions of documentation pages are available by appending `.md` to page URLs; this page is available as [Markdown](https://docs.avonnicomponents.com/experience-cloud/experience-cloud-ja/chtoriaru/reactive-components/guide-to-implementing.md).
# 実装ガイド
## **Avonniコンポーネントにリアクティビティを実装するためのガイド**
リアクティブデータコンポーネントの設定方法を解説するこのガイドで、Avonniコンポーネントを動的でインタラクティブな体験へと変えましょう。このチュートリアルでは、コンポーネントがデータを表示し、ユーザー操作にリアルタイムで応答できるようにする手順を案内します。
{% hint style="info" %}
リアクティブ対応データ体験コンポーネントは、次のとおりです: [データテーブル](/experience-cloud/experience-cloud-ja/experience-components/ax-data-table.md), [リスト](/experience-cloud/experience-cloud-ja/experience-components/ax-list.md), [マップ](/experience-cloud/experience-cloud-ja/experience-components/ax-map.md), [タイムライン](/experience-cloud/experience-cloud-ja/experience-components/ax-timeline.md) そして Avonni テキストブロックです。
{% endhint %}
### ステップ1:データコンポーネントにAPI名を割り当てる
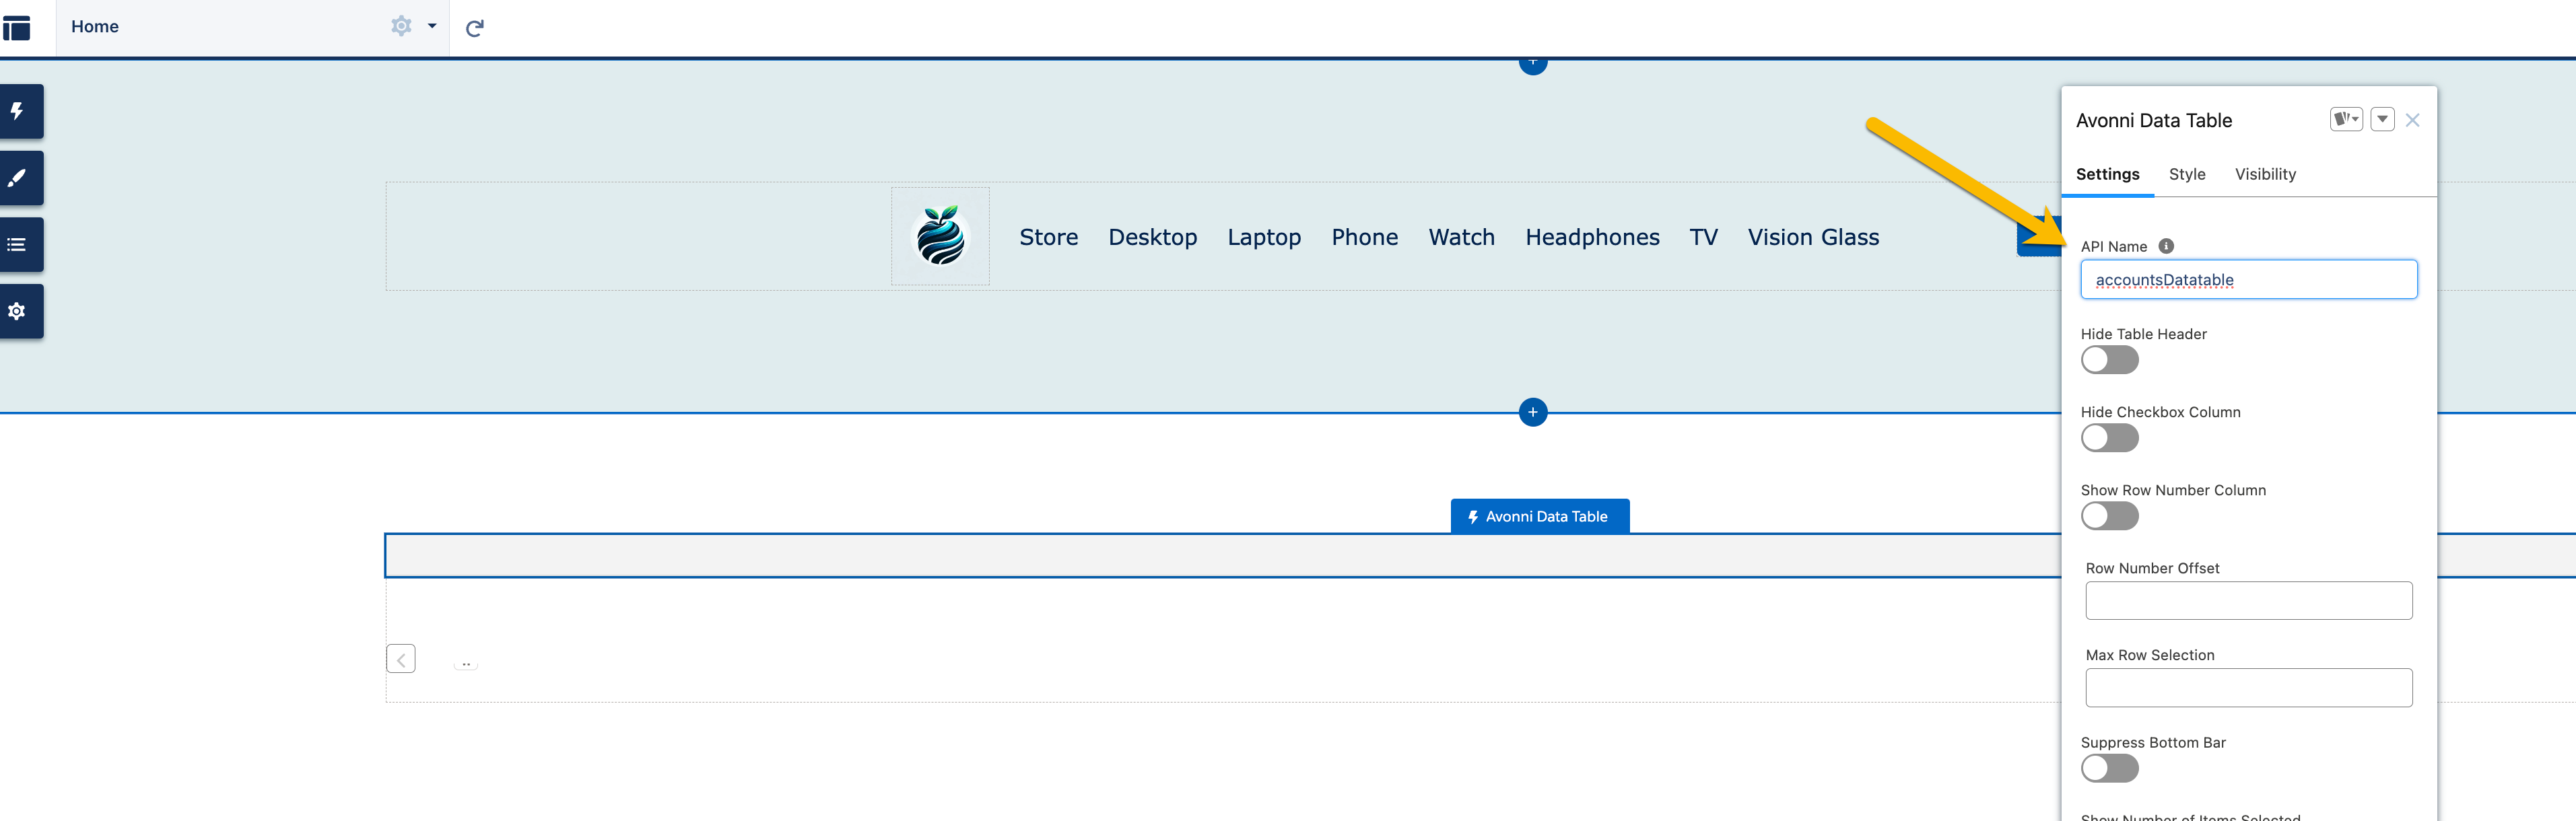
まず、各データコンポーネントに一意の識別子、つまりAPI名を付けます。この名前は参照ポイントとして機能し、ページのさまざまな部分が相互に通信できるようにします。
* **例**:
* データテーブルコンポーネントを使用している場合、次のように名付けられます `accountsDatatable`.
### ステップ2:対象コンポーネントでリアクティブ式を設定する
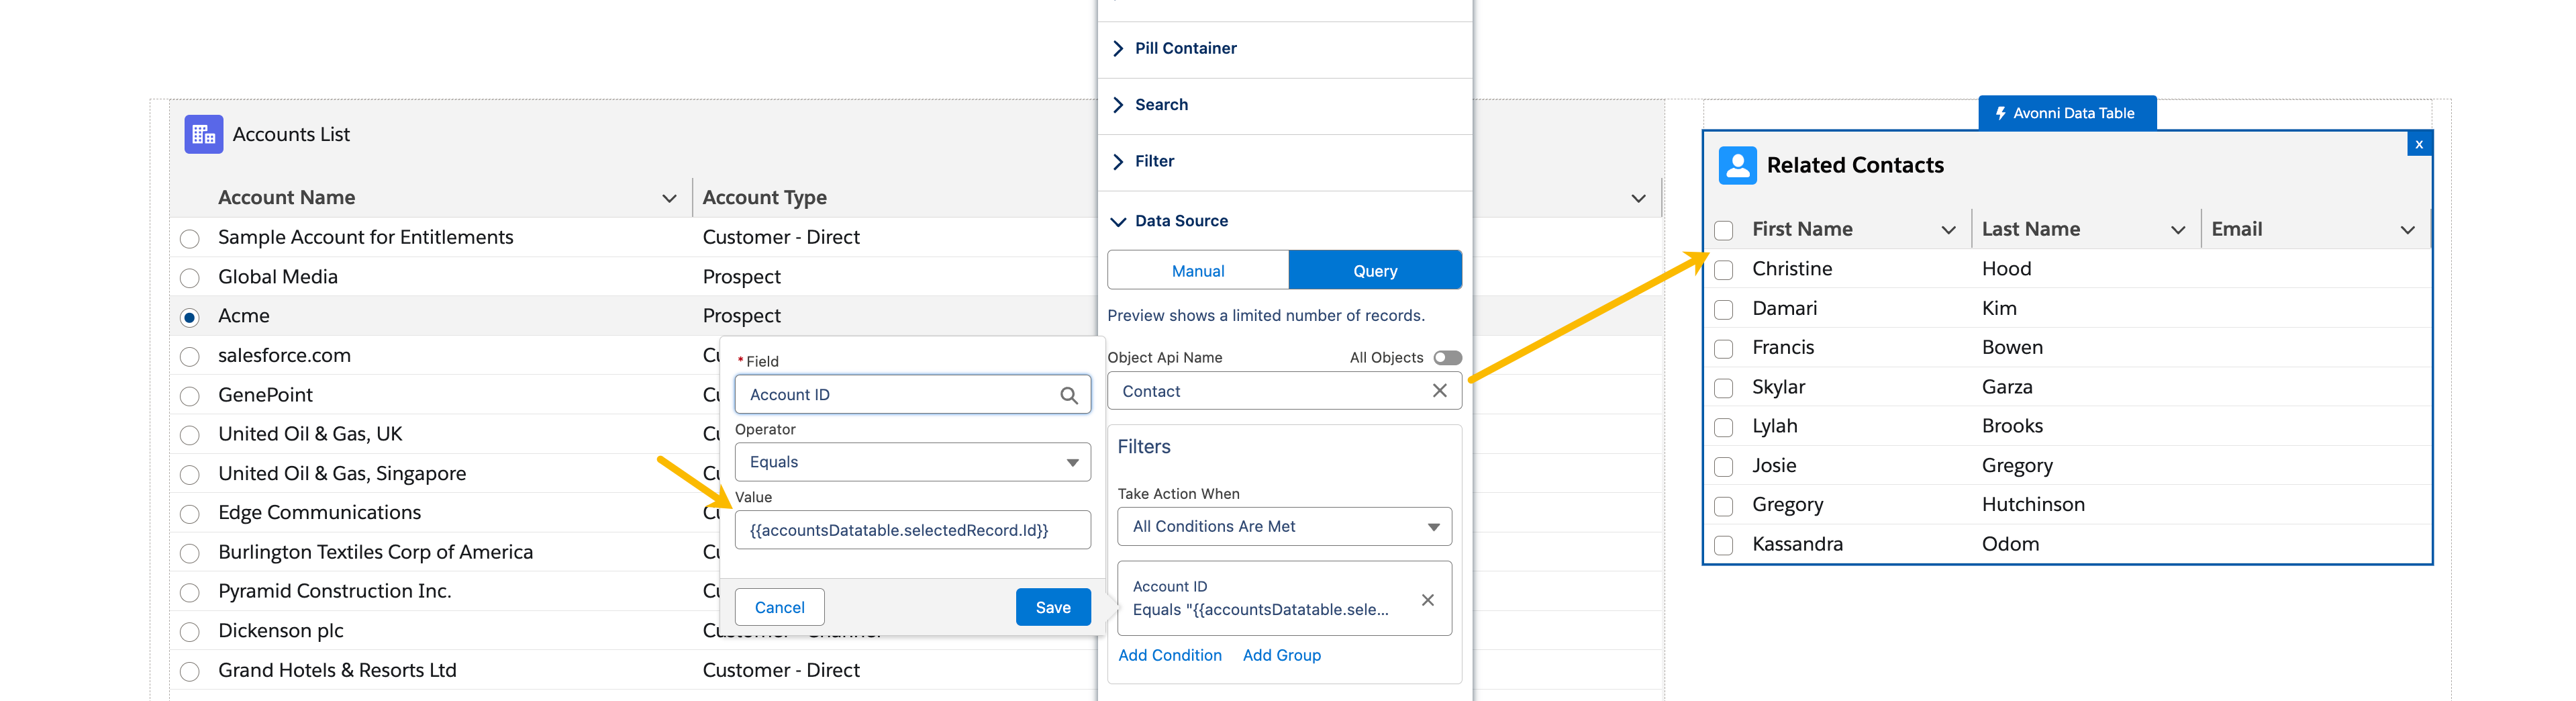
次に、インタラクティブなデータをどこに表示したいかを決めます。これは、テキストブロック、別のデータテーブル、またはデータを表示する任意のコンポーネント内にできます。ここでは、リアクティブ式を使って、フィルターメニューでどのデータをいつ表示するかをコンポーネントに指示します。
* **リアクティブ式の形式**: 次の形式を使用します `{{componentApiName.selectedRecord.componentFieldApiName}}` を使ってコンポーネントを連携します。
* `componentApiName`: ここには、データコンポーネントのAPI名(上で `accountsDatatable` と名付けたもの)を入れます。
* `componentFieldApiName`: これは、表示したいレコードの特定のフィールドを指します(たとえば、 `名前` または `業界`).
* **例**:
* あなたの~から選択したレコードの「Name」フィールドを表示するには `accountsDatatable`、次を使用します `{{accountsDatatable.selectedRecord.Name}}`.
* 同じ選択から「Industry」フィールドを表示するには、次を使用します `{{accountsDatatable.selectedRecord.Industry}}`.
### 実用的な使用例:
1. **アカウントを可視化するインタラクティブマップ**:
* 次のようなインタラクティブマップがあるとしましょう `accountMap`。ユーザーが場所を選択すると、次のような式を使ってテキストブロックにアカウント名を表示できます `{{accountMap.selectedRecord.Name}}`。これにより、ユーザー操作に基づいて選択したアカウント名が動的に表示されます。
2. **アカウントと連絡先の同期されたデータテーブル**:
* アカウントを表示するテーブル(`accountsDatatable`)と、関連する連絡先を表示する別のテーブル(`contactsDatatable`).
* 次のように設定できます `contactsDatatable` を `accountsDatatable`の選択に反応するように設定できます。たとえば、選択したアカウントに関連付けられた連絡先名を表示するには、次を使用します `{{accountsTable.selectedRecord.Id}}`.
これらの手順によって静的なコンポーネントが豊かで応答性の高い体験へと変わり、Webアプリケーションがより直感的で使いやすくなります。リアクティブデータの力は、サイト上のあらゆる操作をつながりのある、目的のあるものに感じさせられる点にあります。
楽しく作りましょう!
---
# Agent Instructions
This documentation is published with GitBook. GitBook is the documentation platform designed so that both humans and AI agents can read, navigate, and reason over technical content effectively. Learn more at gitbook.com.
## Querying This Documentation
If you need additional information that is not directly available in this page, you can query the documentation dynamically by asking a question.
Perform an HTTP GET request on the current page URL with the `ask` query parameter, and the optional `goal` query parameter:
```
GET https://docs.avonnicomponents.com/experience-cloud/experience-cloud-ja/chtoriaru/reactive-components/guide-to-implementing.md?ask=&goal=
```
`ask` is the immediate question: it should be specific, self-contained, and written in natural language.
`goal` is optional and describes the broader end goal you are ultimately trying to accomplish on behalf of the user. GitBook uses it to tailor the answer towards what is most useful for that goal.
The response will contain a direct answer to the question and relevant excerpts and sources from the documentation.
Use this mechanism when the answer is not explicitly present in the current page, you need clarification or additional context, or you want to retrieve related documentation sections.