> For the complete documentation index, see [llms.txt](https://docs.avonnicomponents.com/llms.txt). Markdown versions of documentation pages are available by appending `.md` to page URLs; this page is available as [Markdown](https://docs.avonnicomponents.com/dynamic-components/tutorials/components/data-table/apply-conditional-cell-styling.md).
# Apply Conditional Cell Styling
## Overview
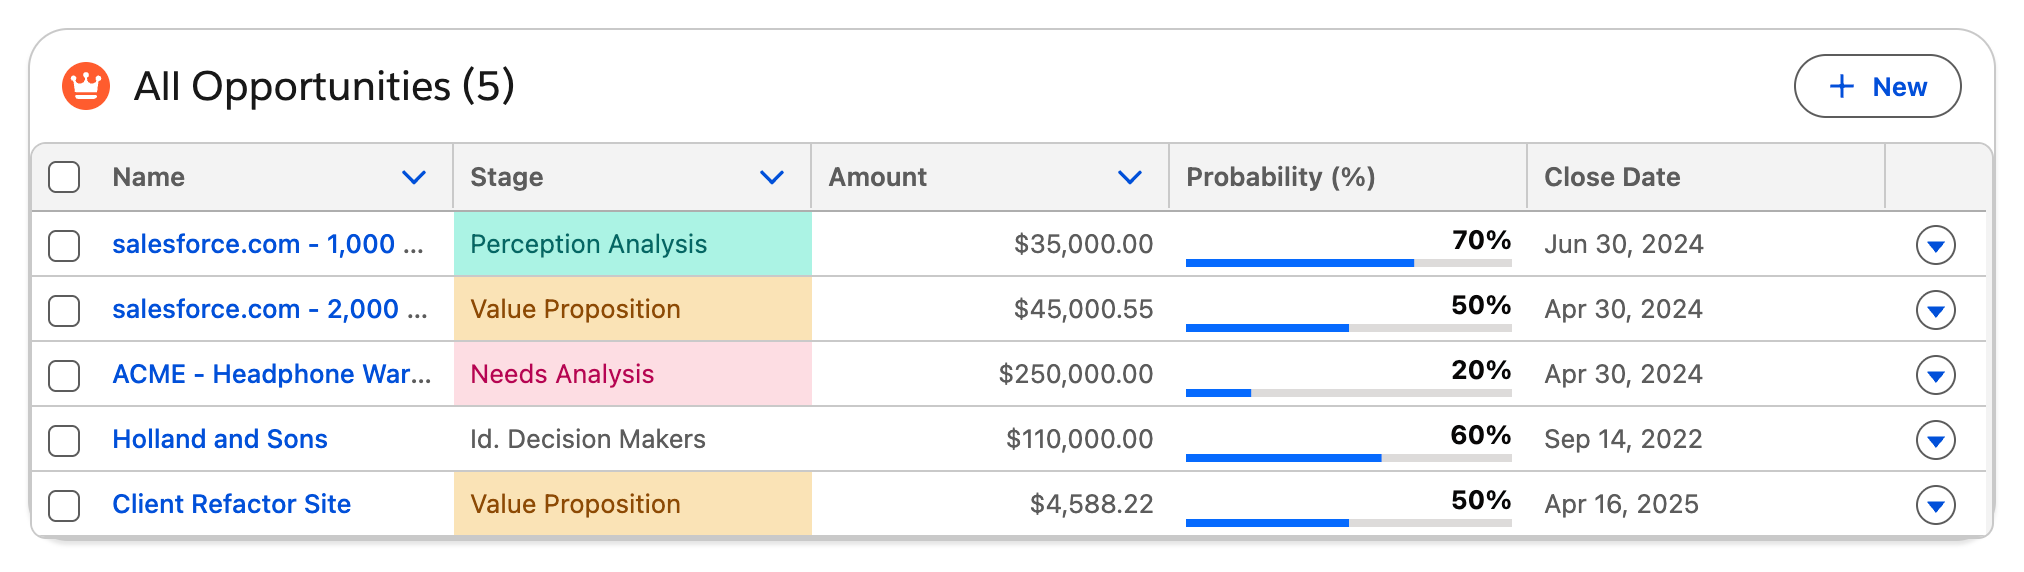
This tutorial explains how to customize the appearance of cells within an [**Avonni Data Table**](/dynamic-components/components/data-table.md) in Avonni Dynamic Components. You'll learn how to apply a consistent style to an entire column or implement powerful conditional styling where a cell's appearance (like its background color) changes based on the data in its row.
***
### Core Concept: The `SLDS Cell Class` Attribute
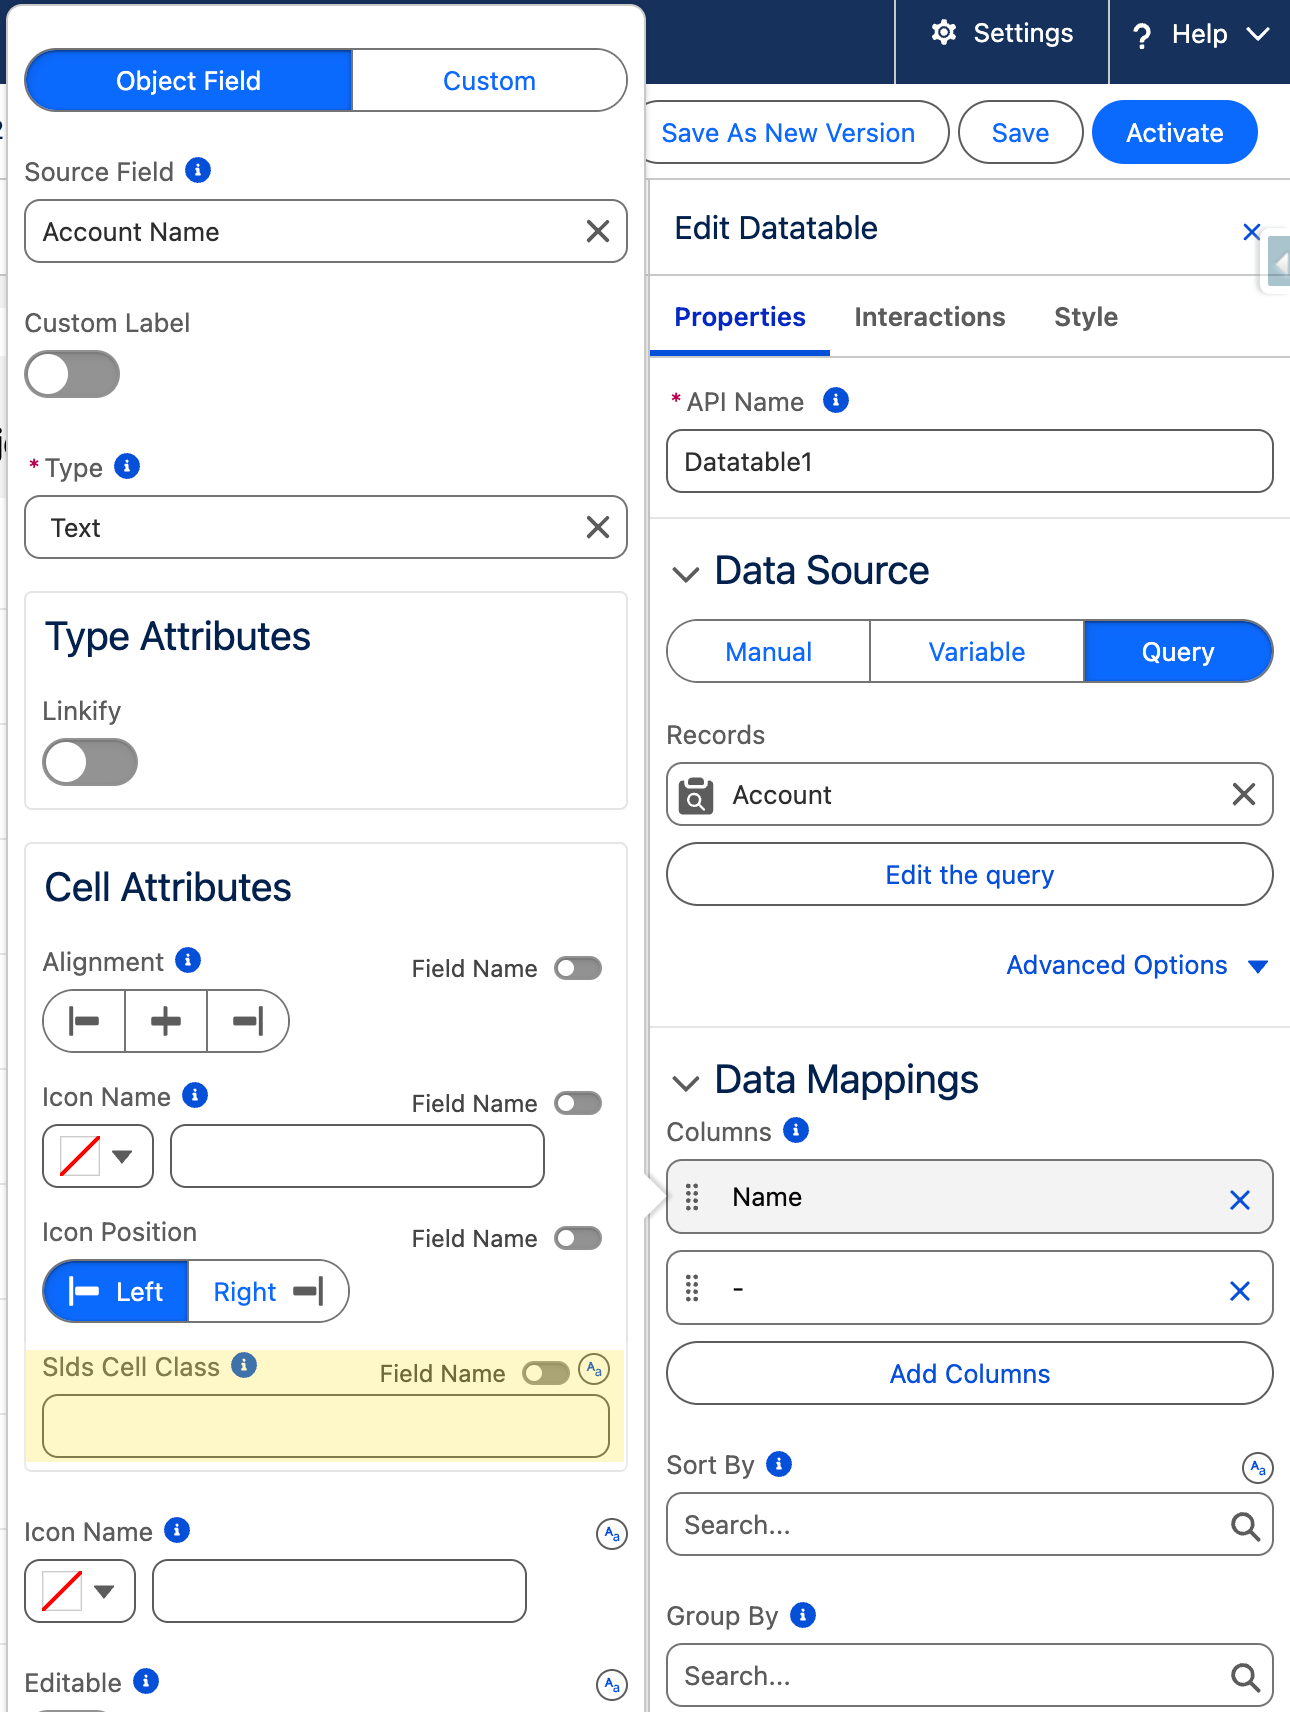
The key to all cell styling in the Avonni Data Table is the **SLDS Cell Class** attribute. It's found within the configuration settings for each column.
1. Select your Avonni **Data Table** component on the canvas.
2. In the Properties Panel, go to the **Columns** section.
3. Select the specific column you want to style.
4. Navigate to the **Cell Attributes** settings for that column.
5. Locate the **SLDS Cell Class** input field.
This field accepts standard SLDS (Salesforce Lightning Design System) class names, allowing you to control text color, background color, font weight, and more.
***
## Method 1: Applying Static Styling (Same Style for All Rows)
Use this simple method when you want every cell in a specific column to have the same, unchanging style.
**Steps:**
1. Navigate to the **SLDS Cell Class** attribute for your desired column (as described above).
2. Directly **type the SLDS class names** you want to apply into the field. Separate multiple classes with a space.
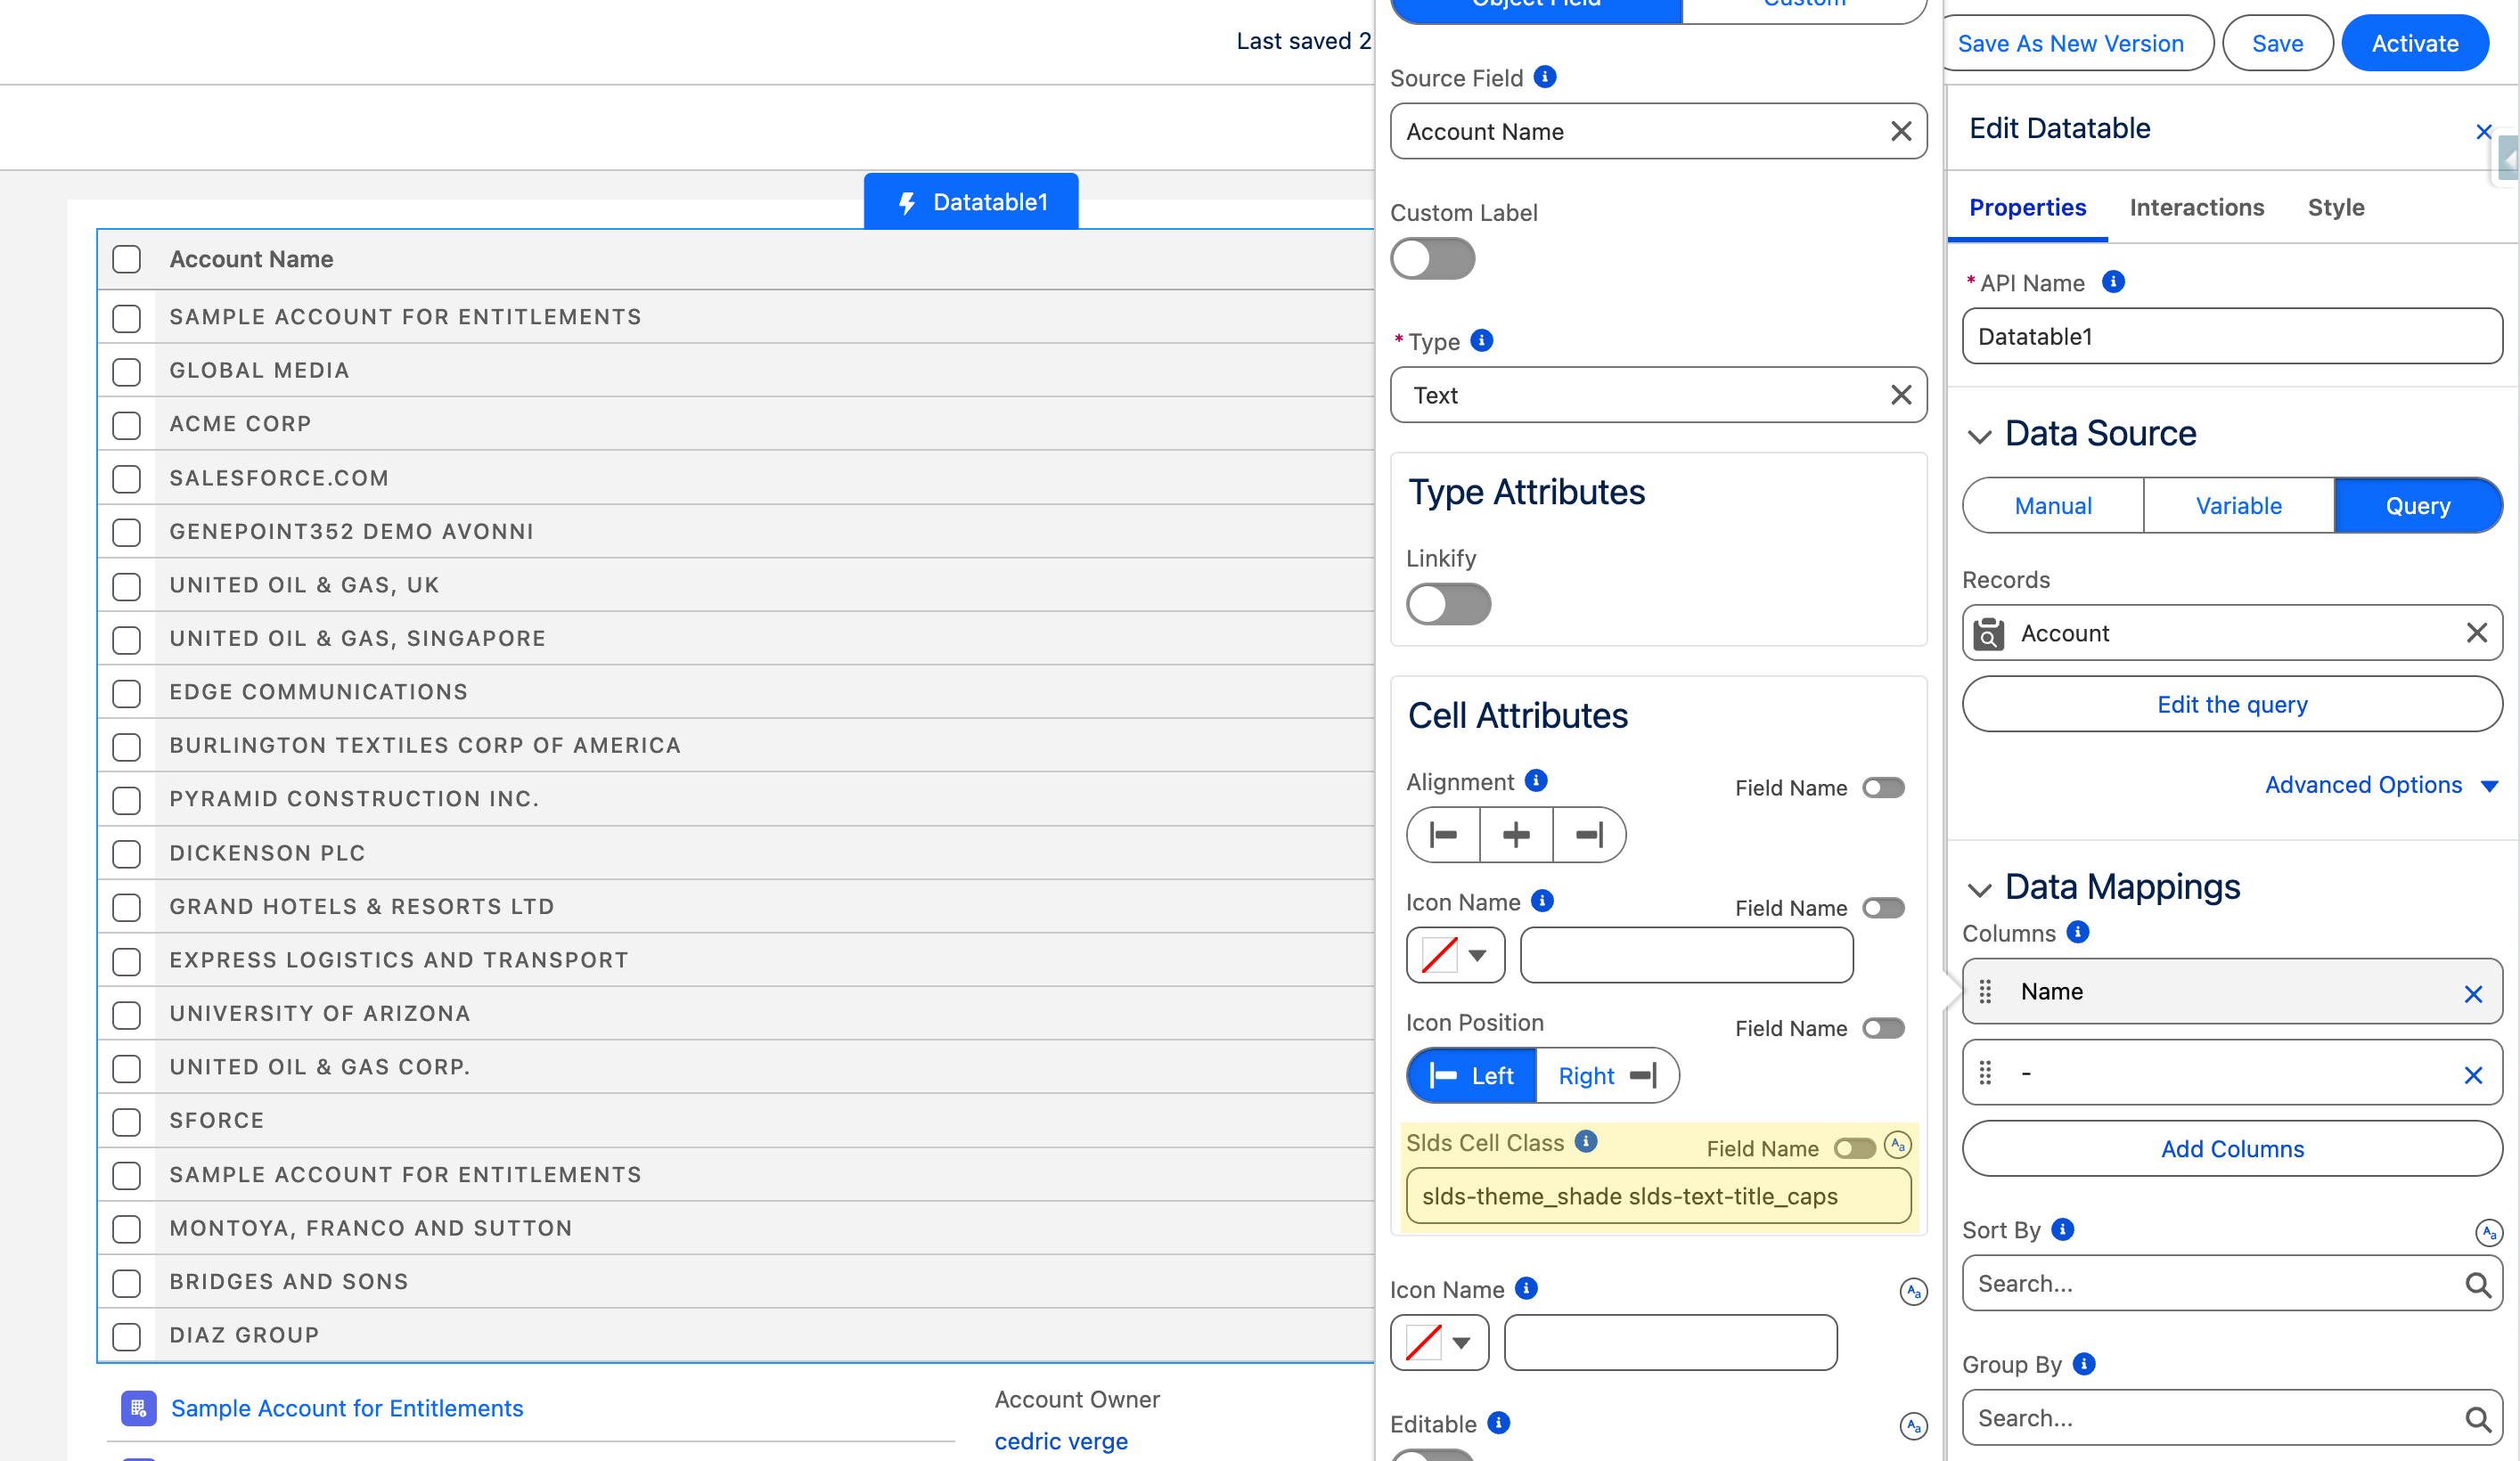
* **Example 1:** To make all text in the column green and bold, enter: `slds-text-color_success slds-font-weight_bold`
* **Example 2:** To give all cells a light grey background and capitalize the text, enter: `slds-theme_shade slds-text-title_caps`
SLDS Classes for Cell Styling
The styling will be applied consistently to all rows in that column.
***
## Method 2: Conditional Styling (Style Based on Row Data)
This is a more powerful technique in which a cell's appearance dynamically changes based on the data within its row. This is perfect for visually indicating status, priority, or risk levels.
The easiest and most maintainable way to achieve this is by mapping the **`SLDS Cell Class`** attribute directly to a **Salesforce Formula Field**.
SLDS Classes for Cell Styling
#### Step 1: Create a Salesforce Formula Field
First, create a formula field on the Salesforce object that your data table displays (e.g., on the Opportunity, Case, or Account object). This formula will determine which SLDS classes to use based on other fields in the record.
1. In Salesforce **Setup**, navigate to the object you are using (e.g., Opportunity).
2. Create a new **Formula Field**.
3. Set the **Formula Return Type** to **Text**.
4. In the formula editor, use logic (like a `CASE()` or `IF()` statement) to output the desired SLDS class string.
**Example Formula on an Opportunity object (Field Name: `StageStyle`):**
```
CASE(
StageName,
"Closed Won", "slds-theme_shade slds-theme_success",
"Closed Lost", "slds-theme_shade slds-theme_error slds-text-color_inverse",
"Needs Analysis", "slds-theme_shade slds-theme_warning",
"Prospecting", "slds-theme_shade",
""
)
```
*This formula checks the `StageName` field and returns a different set of SLDS classes for each stage, resulting in different background/text colors.*
5. Save your new formula field.
#### Step 2: Configure the Data Table
1. **Update Your Query:** In your Dynamic Component, go to the **Avonni Query Data Source** for your Data Table. **Crucially, make sure to add your new Salesforce formula field** (e.g., `StageStyle__c`) to the list of queried fields.
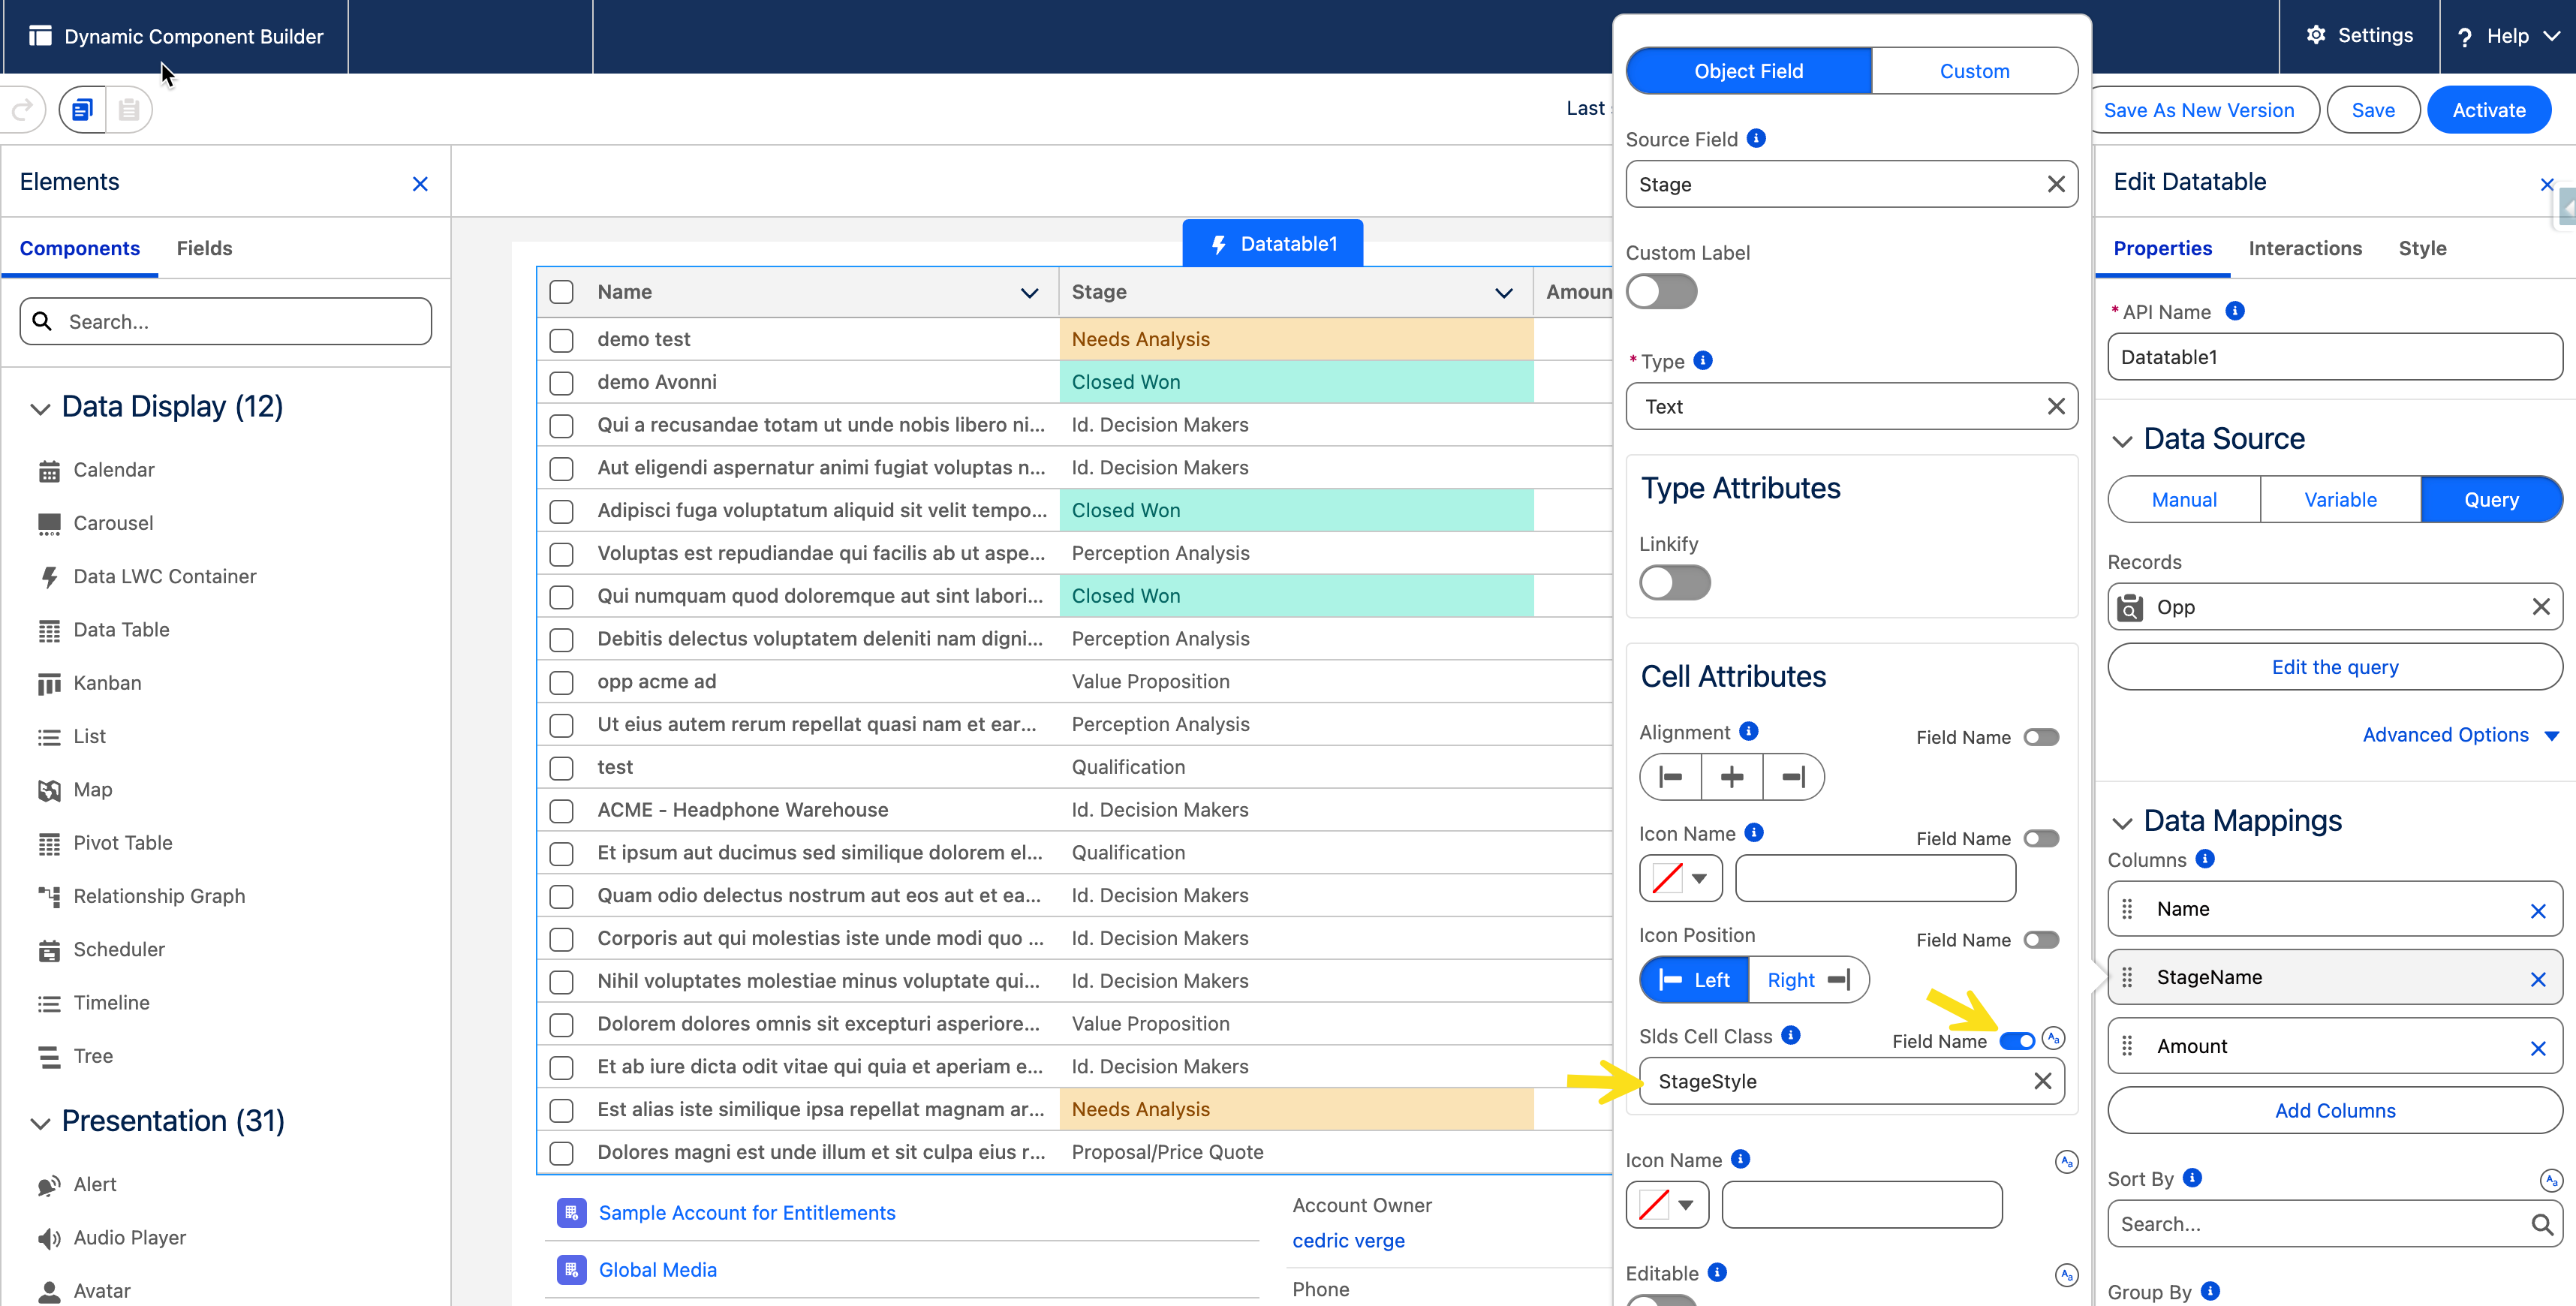
2. **Map the Column:** In the Data Table's properties, go to the **Columns** section and select the column you want to style (e.g., the `StageName` column).
3. **Bind the SLDS Cell Class:**
* Navigate to the **Cell Attributes** for that column.
* Find the **SLDS Cell Class** property.
* Toggle the field name option.
* Select your new Salesforce formula field from the list of available fields (e.g., `StageStyle__c`).
**Result:** When the component loads, the Data Table will evaluate the `StageStyle__c` formula field *for each row*. It will then apply the corresponding SLDS classes, automatically coloring each cell based on the Opportunity's stage.
***
## SLDS Classes for Cell Styling
Here are some standard SLDS classes you can use in your formulas or for static styling (combine them with spaces):
* **Backgrounds:** `slds-theme_success` (green), `slds-theme_error` (red), `slds-theme_warning` (yellow), `slds-theme_info` (blue), `slds-theme_shade` (light grey - a good base).
* **Text Color:** `slds-text-color_success` (green), `slds-text-color_error` (red), `slds-text-color_warning` (dark yellow), `slds-text-color_inverse` (white - for dark backgrounds).
* **Text Style:** `slds-text-title_caps` (ALL CAPS), `slds-font-weight_bold` (**bold**), `slds-font-style_italic` (*italic*).
***
## Conclusion
The `SLDS Cell Class` attribute provides a flexible way to enhance data presentation in your Avonni Data Table. You can apply simple static styling or, more powerfully, use Salesforce Formula Fields to implement data-driven conditional formatting, effectively highlighting key information for your users.
---
# Agent Instructions
This documentation is published with GitBook. GitBook is the documentation platform designed so that both humans and AI agents can read, navigate, and reason over technical content effectively. Learn more at gitbook.com.
## Querying This Documentation
If you need additional information that is not directly available in this page, you can query the documentation dynamically by asking a question.
Perform an HTTP GET request on the current page URL with the `ask` query parameter, and the optional `goal` query parameter:
```
GET https://docs.avonnicomponents.com/dynamic-components/tutorials/components/data-table/apply-conditional-cell-styling.md?ask=&goal=
```
`ask` is the immediate question: it should be specific, self-contained, and written in natural language.
`goal` is optional and describes the broader end goal you are ultimately trying to accomplish on behalf of the user. GitBook uses it to tailor the answer towards what is most useful for that goal.
The response will contain a direct answer to the question and relevant excerpts and sources from the documentation.
Use this mechanism when the answer is not explicitly present in the current page, you need clarification or additional context, or you want to retrieve related documentation sections.